
Station 1: Methane Formation and Capture Simulation
Before starting the experiment, read the instructions carefully so that the step-by-step procedure is clear to everyone in the group.
Procedure
- Add 1 tsp of sugar and 1 packet (or 2 tsp) of yeast to a flask.
- With the funnel, add warm water to fill one-third of the flask and swirl gently.
- Place a balloon tightly over the flask opening.
- Observe for 15 minutes, measuring the diameter with the ruler or measuring tape every 5 minutes, recording your measurements in the Data Table.
- Record any additional observations (color, smell, bubbles, etc.) on the Data Table.
- Tidy up the station area, rinse out the flask, throw the balloon away, and return all materials to the proper place.
Data Table
| Time (min) | Diameter (cm) | Additional Observations |
| 0 | ||
| 5 | ||
| 10 | ||
| 15 |
Analysis Questions
- What is the process that is causing the balloon to inflate?
- How does this simulate biogas or landfill methane production? What are some major similarities and differences?
Station 2: Hydraulic Fracturing and Permeability Simulation
Before starting the experiment, read the instructions carefully so that the step-by-step procedure is clear to everyone in the group.
Procedure
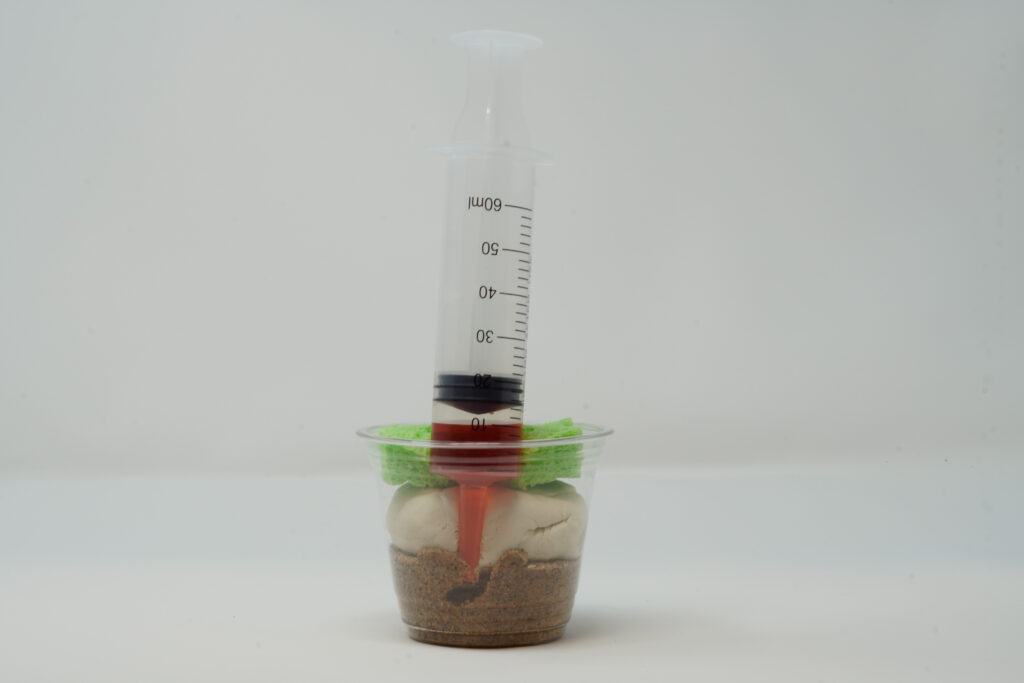
- Create layers in your clear container. Start (at the bottom) with an approximately one inch layer of sand, representing the gas reservoir.
- Next, add an approximately one inch layer of clay, representing cap rock.
- Last, add an approximately one inch layer of sponge, representing porous rock.
- Fill the syringe with 20 mL of colored water.
- Inject the colored water into the bottom sand layer, by inserting the syringe along the side of the container.
- Observe how and where the fluid travels, and record your observations in the Data Table. Feel free to add sketches along with your descriptions.
- Tidy up the station area, replace layers that are reusable and throw away those that are not (e.g. sand), rinse out the container, and return all materials to the proper place.
Data Table
| Injection Volume (mL) | Visible Fracture Spread (length, direction) | Clay Layer Behaviors (cracks, leaks) | Water Movement Route (speed, route) |
Analysis Questions
- How does this simulation model hydraulic fracturing? What are some major similarities and differences?
- What are some possible environmental risks?
Station 3: Combustion Energy Simulation
Before starting the experiment, read the instructions carefully so that the step-by-step procedure is clear to everyone in the group.
Important! Safety Guidelines
Only one group should conduct this experiment at a time due to the use of open flames the handling of hot materials. All students must wear safety goggles and heat-resistant gloves and use beaker tongs when handling hot materials.
Procedure
- Prepare three identical metal cans, each containing 50 mL of water.
- Record the initial temperature using a thermometer and record that data on the Data Table.
- Set the tripod and candle in the middle of your work area.
- Place the can of water on the tripod above the candle. Make sure that the can is secure.
- Light the candle and immediately start a timer. Allow the water to heat for exactly 3 minutes.
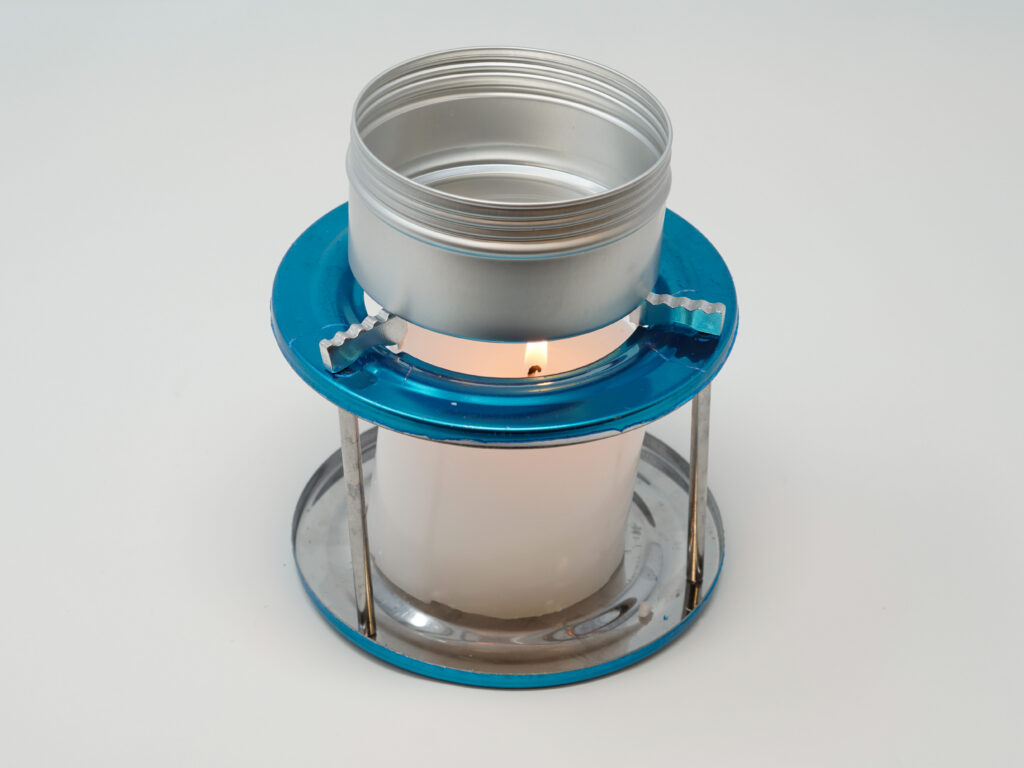
- At the 3-minute mark, extinguish the flame. Measure temperature immediately after and record the final water temperature on the Data Table.
- Record any additional observations, such as soot, smell, smoke, etc.
- Let the metal can on the tripod cool for a minute. Then, using the beaker tongs, carefully remove the can and place it in a safe location where it can cool.
- Carefully remove the candle and replace it with the ethanol gel can.
- Place the second can of water on the tripod above the ethanol gel can.
- Light the ethanol gel can and repeat the procedure once again, filling out your data table.
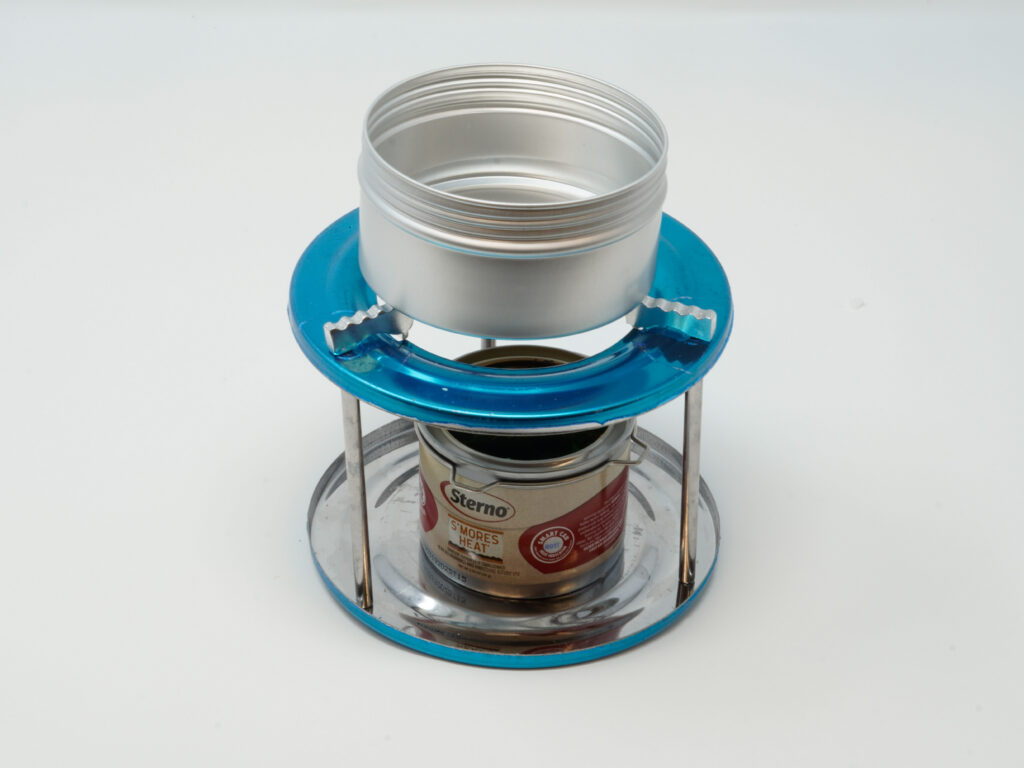
- To extinguish the ethanol gel flame, use the beaker tongs to secure the lid over the can.
- Remove the ethanol gel can with the beaker tongs and place it in a safe location where it can cool.
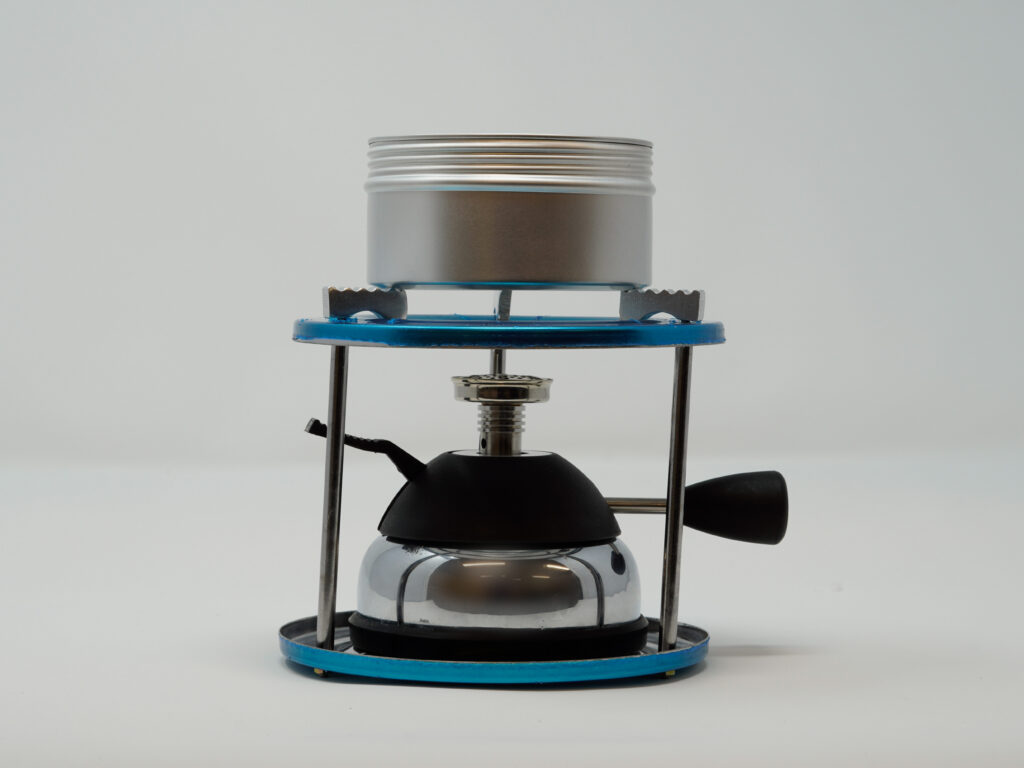
- Place the natural gas burner beneath the tripod. Place the third can of water on the tripod.
- Turn on the natural gas burner, adjust to a consistent high flame setting, and repeat the 3-minute heating procedure.
- Tidy up the station area, empty and rinse containers (use beaker tongs to cool down metal cans with cold water, so it’s safe for the next group to use), and return all materials to their proper place.
Data Table
| Fuel Type | Initial Temp (Celsius) | Final Temp (Celsius) | Temp Change (Celsius) | Other Observations |
| Candle | ||||
| Ethanol Gel | ||||
| Natural Gas |
Analysis Questions
- Which fuel caused the greatest temperature change in the water? Describe comparative results.
- Based on your results, how does natural gas compare in terms of heat transfer efficiency in this setup? What factors might affect this result?
Wrap Up Activity
In the space below, draw a concept map showing the lifecycle of natural gas. Use the following titles.
Formation → Extraction → Combustion → Use → Environmental Impact
For each section, add a description of that stage, as well as notes concerning benefits and impacts at each stage.
Conclusion Questions
- What are the main advantages of using natural gas?
- What are its key environmental concerns?
- How do science and technology address these concerns?