

Introduction
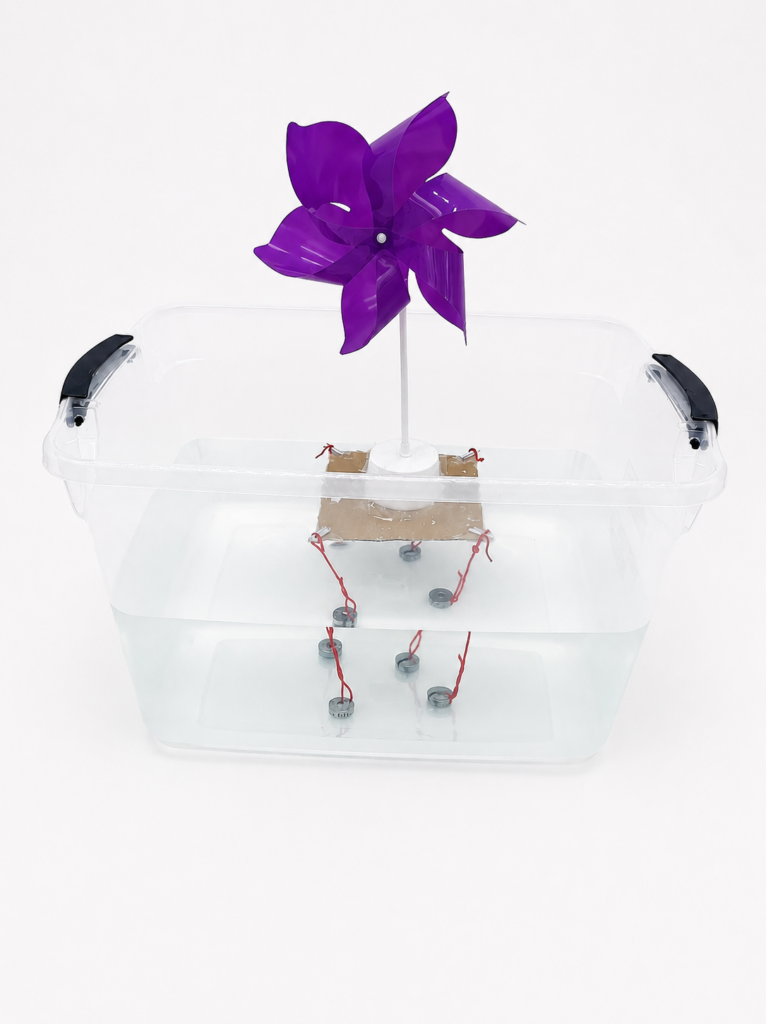
In this hands-on engineering activity, students will design and build a floating, moored platform that supports a pinwheel used as a model wind turbine. Students will explore how offshore wind turbines can operate in deep ocean waters, where depths greater than approximately 60 meters make traditional fixed foundations difficult and expensive to use. Using concepts of buoyancy, balance, stability, and structural design, they will test and improve their designs through the engineering design process while investigating how wind and waves affect offshore structures.
Student Objectives
Students will be able to
- Explain how offshore wind turbines can operate in deep water using floating platforms and anchoring systems.
- Design, build, test, and improve a floating, moored wind turbine platform.
- Evaluate how different design choices impact the performance and stability of their platform.
Materials
Per Group
- Student Handout
- Pinwheel
- Floating materials, such as:
- Plastic bottles or cups
- Foam
- Corks
- Cardboard/clear packing tape
- Weights, such as washers or coins
- String
- Tape (clear packing, duct, etc.)
- Stopwatch or timer
- Blank paper for design sketch
Whole Class
- Large tub or bin of water for testing
- Fan, for wind simulation
Procedure
Setup
- Before beginning the activity, organize the building materials on a table or prepare material packets for each team.
- Set up the water testing tub and fan ahead of time. Determine a consistent distance between the fan and the water tub (for example, 1.5 feet), based on the strength and height of the fan, and use the same distance (and fan speed) for all teams during testing.
Introduction
- Divide students into groups of 2-3 and provide them with the Student Handout.
- Review the Introduction in the Student Handout and discuss:
- Why wind turbines are built in the ocean.
- Differences between shallow-water and deep-water turbines.
- Why floating platforms are needed in deep water.
- Explain that engineers must design offshore systems that:
- Float while supporting heavy equipment.
- Remain upright and balanced.
- Stay anchored in place.
- Allow the turbine blades to spin efficiently in the wind.
- Withstand wind, waves, and ocean movement.
- Introduce the engineering challenge: Can you design a floating platform for a model wind turbine that remains upright, anchored, and spinning during wind and wave conditions?
Plan the Design
- Show students the available building materials, but do not distribute them yet.
- Instruct teams to follow the instructions on the Student Handout:
- Brainstorm ideas.
- Sketch a design.
- List the materials they plan to use.
- Encourage students to think about:
- Balance
- Weight distribution
- Base width
- Anchoring systems (weights)
- Buoyancy
- Approve student plans before materials are distributed.
Build the Prototype
- Students build their floating wind turbine platform prototype.
- Remind students of the requirements (also included in the Student Handout). Their structure must:
- Float
- Hold the turbine model upright
- Allow the turbine blades to spin
- Resist drifting
- Survive waves
- Be at least 1 ft tall
Testing Phase
- Students test their structures and record results in the Student Handout.
- Float Test
- Place the structure in the water.
- Time 10 seconds.
- Observe whether it floats steadily.
- Drift Test
- Use a fan to simulate wind.
- Keep the fan at a consistent distance and speed for all groups.
- Time 10 seconds.
- Observe whether the platform stays in place or drifts.
- Wind Test
- Adjust the fan’s angle so that it hits the turbine blades at the right spot.
- Keep the fan at a consistent distance and speed for all groups.
- Time 10 seconds.
- Observe whether the turbine spins continuously.
- Wave Test
- Teacher: Create small waves by gently sloshing the water or tapping the container.
- Time 10 seconds.
- Observe whether the platform tilts and recovers.
- Float Test
Redesign and Retesting
- Students analyze weaknesses in their original design.
- Teams redesign or improve their structure.
- Students repeat all four tests and record new data.
- Students will compare their first and second test results.
Reflection
- Students complete the reflection questions in the Student Handout.
- Lead a class discussion about:
- Which designs were most stable and why.
- How buoyancy and balance affected performance.
- Why offshore wind engineers test and redesign structures repeatedly.
- How real offshore turbines are anchored in the ocean.
- Optional Resources