
Light Up Your Classroom This Season with Our New Holiday Circuits Activity

This time of year brings a special kind of energy to the classroom, one that’s equal parts excitement, anticipation, and constant hope that your students will stay engaged and actually learning. That’s why our team is so excited to share our newest hands-on STEM activity with you: Holiday Lights Play-Doh Circuits.
This resource takes one of our most popular activities (Play-Doh and LEDs) and incorporates the magic of holiday lights to create an unforgettable exploration of series and parallel circuits. Plus, it’s inexpensive, easy to plan, and designed to be flexible.
Why Holiday Lights Make the Perfect STEM Activity
Have you ever plugged in a string of older holiday lights, only to discover that one tiny burnt-out bulb has taken the entire strand down with it? Meanwhile, your newer LED strands stay glowing, even if a bulb goes missing.
Your students have probably noticed this too. And it makes a perfect anchor phenomenon to investigate in class.
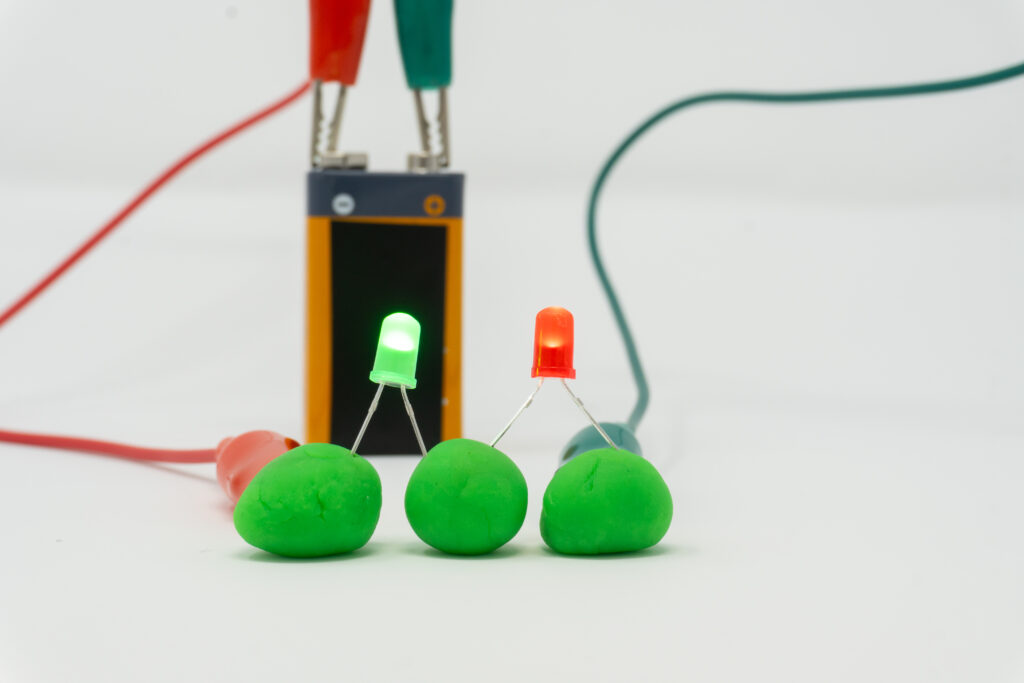
In this lesson, students build their own “holiday light strands” using Play-Doh, LED diodes, and a 9V battery. They’ll investigate why some strands stay lit while others go dark, modeling the exact science behind real holiday lights. You can use our Teacher Guide to direct students through recreating both series and parallel circuits, and prompt them to compare how electricity flows in each type.
It’s festive, hands-on, and meaningful.
What’s Inside the Holiday Lights Play-Doh Circuits Resource
Here’s a quick peek at what your students will do in this lesson:
Part 1: LED Polarity (aka, “Which way does this thing go?”)
Students explore LED anatomy and learn to identify the anode and cathode, which is a foundational skill for building any functional circuit. The handout includes simple explanations that students can follow with minimal support.
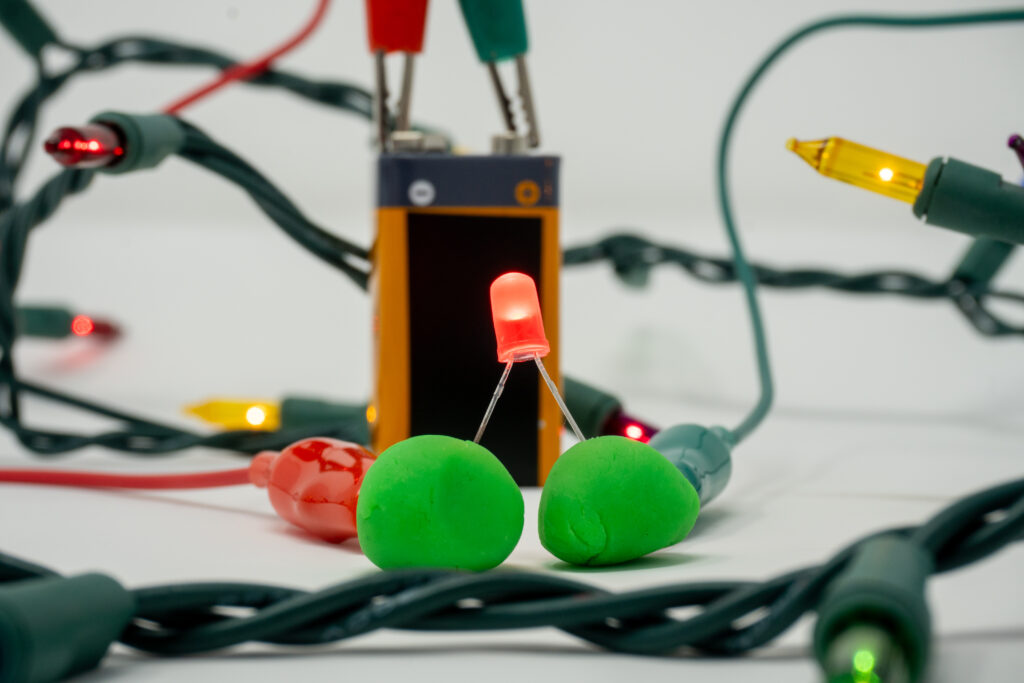
Part 2: Build a Series Circuit (replicate old-school holiday lights)
Students create a working series circuit using Play-Doh and LEDs. Then, the big moment: They remove one LED and watch the entire circuit go dark. The guide prompts them to hypothesize, test, and explain their results.
This is where the lightbulb (literal and figurative) goes on.
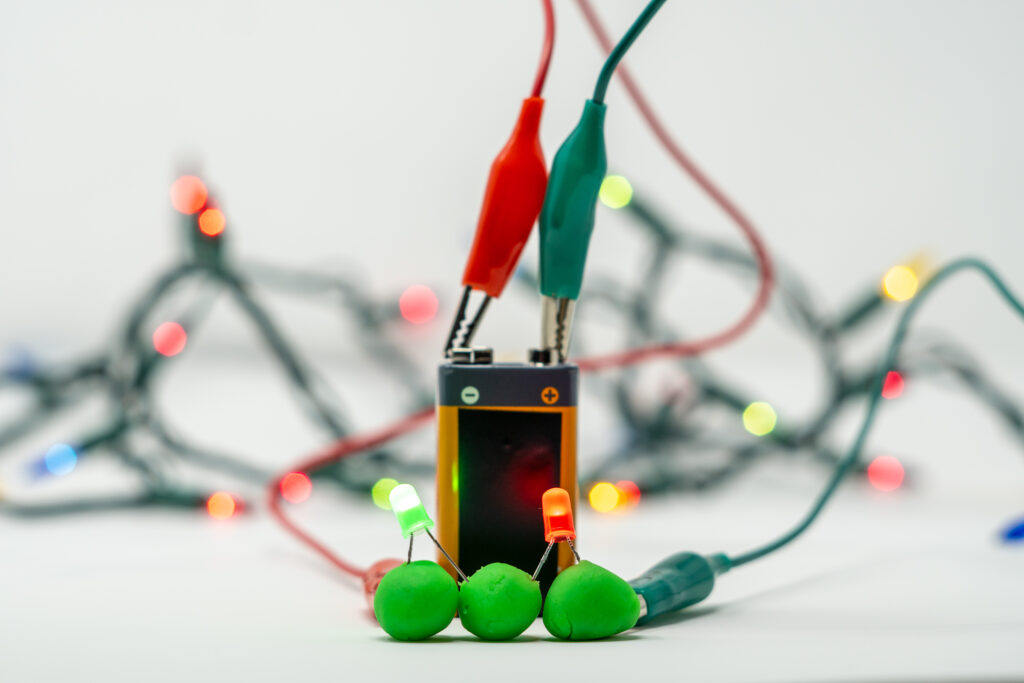
Part 3: Build a Parallel Circuit (Modern Holiday Lights)
Next, students build a parallel circuit. This time, when they remove one LED, the others stay lit. They’ll compare brightness, reliability, and voltage behavior in each setup.
Part 4: Voltage & Current Distribution
Students work on communicating results with a Claim-Evidence-Reasoning task that helps them articulate why brightness and reliability differ between circuit types. It’s a perfectly built-in writing piece for increasing rigor.
Part 5: Real World Connections
Finally, students wrap up the lesson by applying what they learned to actual holiday lights (past and present).
Optional extension: Bring in a real strand of holiday lights and let them test their predictions!
Materials You’ll Need (Per Group)
We intentionally created this activity to be simple and classroom-ready. Check out the links below to order some inexpensive supplies straight to your classroom. Each group only needs:
- A few LED diodes (we recommend holiday colors if you really want to get festive!)
- A 9V battery
- Two alligator clips
- 3-4 small balls of Play-Doh
- (Optional) A strand of real holiday lights

This lesson is super easy to run as a whole-class investigation, a lab station, or even a winter-break send-off activity!
Why Teachers Are Loving Hands-On Circuit Work
Electricity can be one of the trickiest physical science concepts to make click for students. Allowing students to build Play-Doh circuits eliminates that intimidation factor. Students can see and feel the circuit paths, and mistakes become part of the learning…just squish and start again.
This activity builds:
- Science process skills (predict, test, revise)
- Engineering habits of mind
- Collaboration and communication
- Conceptual understanding backed by real-world evidence
Most importantly, your students will leave feeling confident and curious…not confused.
Classroom Tips for a Glowing Experience:
- Keep Play-Doh pieces small (about the size of a penny or smaller)
- Model one LED first, so students understand how polarity impacts the circuit
- Encourage students to troubleshoot together – miswired LEDs make fantastic teachable moments
- Use the optional challenge from the teacher guide to create an intentionally broken circuit and let students diagnose it.
- When everyone has created their circuits, dim the lights and watch the room glow!
Ready to Bring Holiday Magic to Your Classroom?
This activity is festive, easy to implement, and packed with meaningful learning. If you’re looking for a winter lesson that goes beyond crafts or filler time, this is the perfect blend of rigor and joy.
Teacher Guide and Student Pages Included
Your students will love lighting up their own Play-Doh creations, and you’ll love how confidently they start talking about polarity and circuit design!