How to Upload Switch Classroom Lessons into Your Learning Platform
Jump to instructions for using Canvas
Jump to instructions for using Microsoft Teams
Using Canvas
(Three Easy Options. Pick What Fits Your District.)
Switch Classroom resources are designed to be flexible, which means there is more than one “right” way to use them in Canvas. Below are three common workflows APES teachers use, depending on how their district is set up.
You do not need to use all of these. Choose the option that fits your tech environment and teaching style best.
Option 1: Upload the .DOCX File Directly to Canvas (Fastest)
This is the quickest way to get started and works in every Canvas setup.
Best for:
Worksheets, handouts, FRQ practice, teacher-facing materials
Step by step:
- Open your Canvas course
- Click Files in the left-hand menu
- Click Upload and select the downloaded .docx file
- Optional. Create a folder like Unit 6: Energy Resources to stay organized
To make it student-facing:
- Go to Modules
- Click the + button
- Select File
- Choose the uploaded document
- Click Add Item
- Publish the module and item, so they show a green check
Students click, download, complete, and submit if needed.
Option 2: Convert the Lesson into a Canvas Page (Best On-Screen Experience)
If you want students to read and work directly inside Canvas, turning the resource into a Page is a great option.
Best for:
Guided notes, readings, discussion prompts, intro lessons
Step by step:
- Open the .docx file on your computer
- Copy the student-facing content
- In Canvas, go to Pages and click + Page
- Paste the content into the editor
- Use headings, bullets, and tables to clean up formatting
- Click Save and then Publish
- Add the Page to a Module
Tip: If the resource includes teacher notes or answer keys, paste those into a separate Page and leave it unpublished.
Option 3: Use Google Docs and Canvas Assignments (Great for Google Districts)
If your district uses Google Drive, this option is extremely popular because it automatically makes a copy for each student and streamlines grading.
Best for:
Editable worksheets, guided notes, written responses
Step by step:
- Upload the .docx file to Google Drive
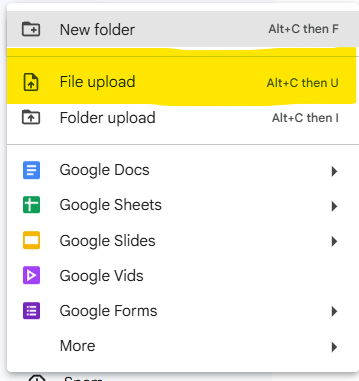

- Open it and choose File, then Save as Google Doc

- In Canvas, go to Assignments and click + Assignment
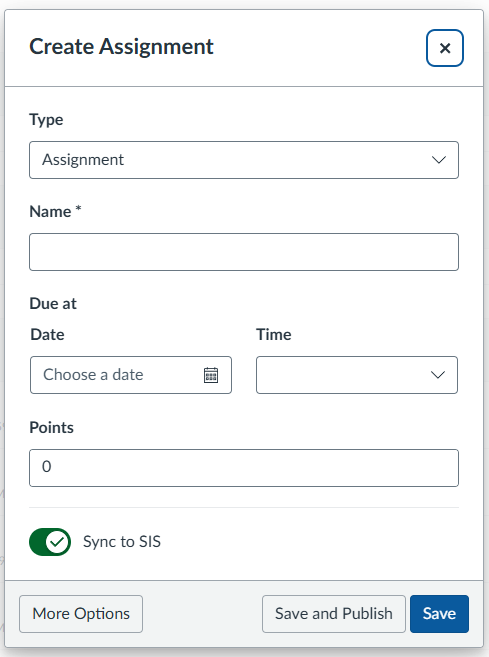
- Enter directions and due date
- Under Submission Type, select External Tool
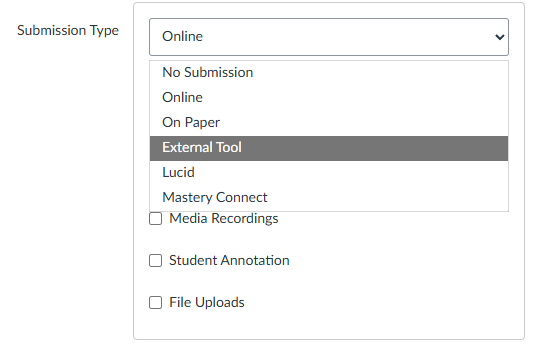
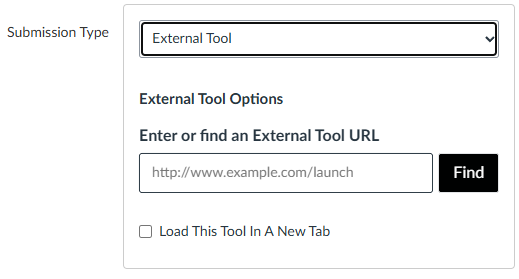
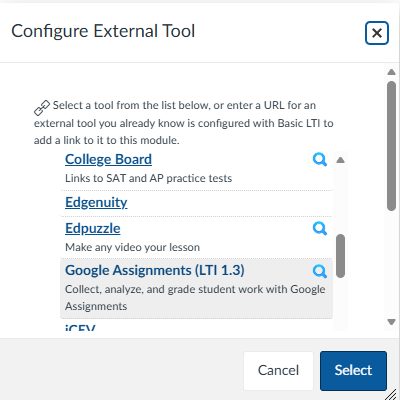
- Choose Google Assignments or your district’s Google integration
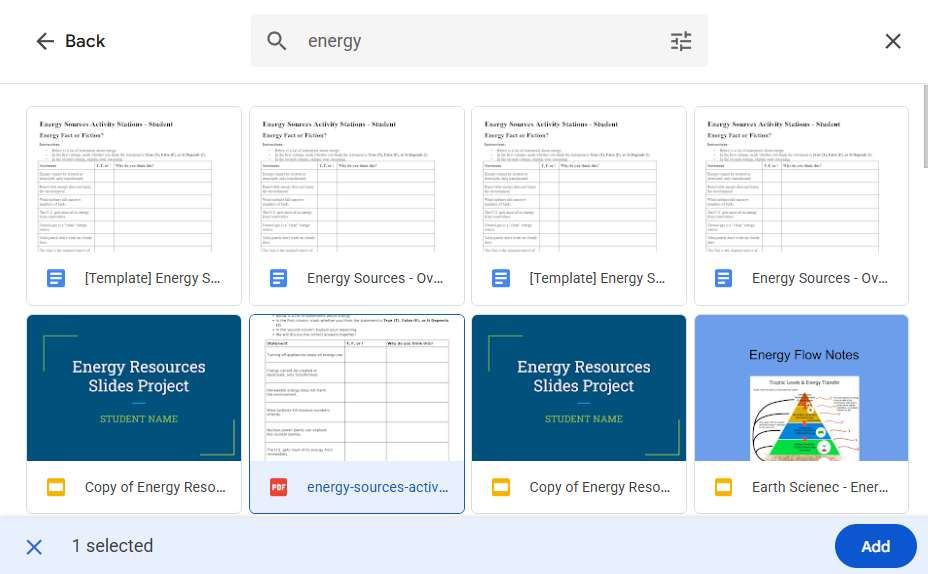
- Attach the Google Doc
- Click Save and then Publish
Canvas will:
- Make a copy for each student
- Allow submission directly in Canvas
- Let you grade efficiently using Canvas and Google tools
This is one of the easiest workflows for feedback-heavy assignments.
Using Microsoft 365 and Teams
If your district uses Microsoft 365, you can also move Switch Classroom materials directly into Teams. The process depends on which Team you’re working in, so the first step is deciding whether this resource is for students or for sharing with colleagues.
Option 1: Classroom Team (Student-Facing)
Best for:
Assignments you want students to access and submit in Teams
Step by step:
- From the Switch Classroom site, download the student guide
- Open Microsoft 365 and go to Teams
- Select your classroom Team
- Click the Assignments tab on the left
- At the bottom, click Create
- Add a title and description for the assignment
- Using the Attach button in the bottom left, upload the student guide file
Students can then open, complete, and submit the work directly in Teams.
Option 2: Department Team (Teacher-Facing)
Best for:
Sharing full lessons with colleagues
Step by step:
- From the Switch Classroom site, download the full lesson plan
- Open Microsoft 365 and go to Teams
- Select your department Team
- In the left menu, choose General under Main Channels
- Click the Shared tab at the top
- Upload the full lesson plan, so other teachers can access it
You’ve now shared a ready-to-use resource with your department and earned yourself some well-deserved brownie points!