
Bell Ringer
Instructions: Select one of the Bell Ringers for students to reflect on and answer.
Vocabulary
Instructions: Go over important terms and their definitions before watching the Science of Natural Gas video. Student vocabulary list can be found in the Student Guide and Science of Natural Gas – Starter Pack.
| Word | Definition | Example |
|---|---|---|
| Livestock | noun; animals raised on farms for food, fiber or work, such as cows, pigs, and sheep | “Livestock makes huge volumes of methane, and so do we.” |
| Emit | verb; to release or send out something, such as light, heat, or gas | “Billions of us emit billions of cubic feet of methane every day.” |
| Microbe | noun; a tiny, living organism, like bacteria or fungi, that can only be seen with a microscope | “Methane is also found in lakes or ponds, wherever microbes break down plants with limited oxygen.” |
| Continental shelf | noun phrase; the underwater edge of continent that slopes gently before dropping to the deep ocean floor | “Methane is very common in water. Bubbling up from swamps, off continental shelves, in springs and water wells . . .” |
| Commercial quantities | noun phrase; amounts large enough to be sold or used in industry or business | “ . . . [the methane is] either not concentrated enough or the technology doesn’t exist to harvest them in commercial quantities.” |
| Digester | noun; a tank or system that breaks down organic material using microbes, often to make biogas | “Some sewage treatment plants now use digesters to turn organic wastes into methane . . . called biogas.” |
| Landfill | noun; a place where trash is buried under layers of soil to manage waste | “All landfills produce methane, and some are capturing it to run small power plants.” |
| Reservoir | noun; a natural underground area, where oil, gas or water collects and is stored | “These conventional reservoirs, like under the Arabian Gulf, are some of the largest natural gas fields in the world.” |
| Fracturing | verb; breaking or causing something to break into pieces or cracks | “ . . . we are drilling horizontal wells into source rocks called shale and fracturing them with high-pressure water injection.” |
| Hydrogen | noun; the lightest chemical element, used as a fuel and found in many compounds | “We now know that natural gas is mostly hydrogen.” |
| Kiln | noun; a high temperature oven used to bake, dry, or process materials like clay or limestone | “This makes natural gas the usual heat source for most industrial equipment like boilers, burners, and kilns . . .” |
| Compressed | verb; stored under high pressure to reduce the space a gas takes up | “ . . . more commonly, [natural gas] is compressed and burned directly in fleets of buses or taxis that have central fueling stations.” |
Quiz
Instructions: Review key concepts after watching the Science of Natural Gas video. The Student Guide and Science of Natural Gas – Starter Pack contain the quiz and cloze notes.
Answer Key: Q1:A Q2:D Q3:C Q4:A
Reading and Extended Reading
Instructions: Provide students with the Science of Natural Gas – Reading or Extended Reading info sheet for an in-depth exploration of the topic.
Reading Answer Key
- Methane.
- From ancient plants and animals buried underground, changed by heat and pressure.
- A method to crack rocks and release trapped gas using high-pressure fluid.
- It can cause small earthquakes or harm water sources.
- Through long underground pipelines.
- It is natural gas cooled into a liquid to make it easier to store and ship.
- Making electricity, heating homes, cooking, powering vehicles, making products.
- To help people smell leaks and stay safe.
- It releases less carbon dioxide than coal or oil.
- Methane collected from waste, like cow farms or landfills.
Extended Reading Answer Key
- Methane.
- From ancient buried plants and animals under heat and pressure, or from tiny microbes in places without oxygen.
- Hydraulic fracturing.
- Because natural gas has no smell, and the odorant helps people detect leaks.
- Pipelines.
- Heating homes and cooking.
- Liquefied Natural Gas; it’s useful for transporting gas overseas where pipelines don’t reach.
- Leaks can cause explosions or fires.
- It releases carbon dioxide, a greenhouse gas.
- It has increased, especially for electricity generation, while coal use has decreased.
- Because it emits less CO₂ than coal and oil, it can help reduce emissions while cleaner sources like wind and solar continue to grow.
- Hydraulic fracturing increases gas supply and energy independence, but it can also cause water pollution, earthquakes, and habitat disruption.
- Natural gas could replace more polluting fuels like coal to cut emissions fast. However, it’s still a fossil fuel and contributes to climate change, so it’s not a permanent solution.
- Ancient China.
- Fredonia Gas Light Company in Fredonia, New York.
Computation
Instructions: Provide students with the Science of Natural Gas – Computation activity for math integration and practice.
Answer Key Q1: Energy per day: 2400 ft2 × 60 BTUs per ft2 = 144,000 BTUs per day
Total energy over 90 days: 144,000 × 90 = 12,960,000 BTUs
12,960,000 BTUs / 1030 BTU per ft3 = 12,582.52 ft3
12,582.52 ft3 / 1000 = 12.58 mcf
Q2: Actual gas needed = energy needed / efficiency of furnace
12.58 mcf / 0.8 = 15.725 mcf
Cost = Actual gas needed × Cost per mcf
15.725 mcf × $6.00 per mcf = $94.35
Q3: 12.58 mcf / 0.9 = 13.98 mcf
13.98 mcf × $6.00 per mcf = $83.88
$94.35 – $83.88 = $10.47 (3 months)
$10.47 × 4 = approximately $41.88 saved over a year
Data Set
Instructions: Provide students with the Science of Natural Gas – Data Set for data literacy and analysis practice.
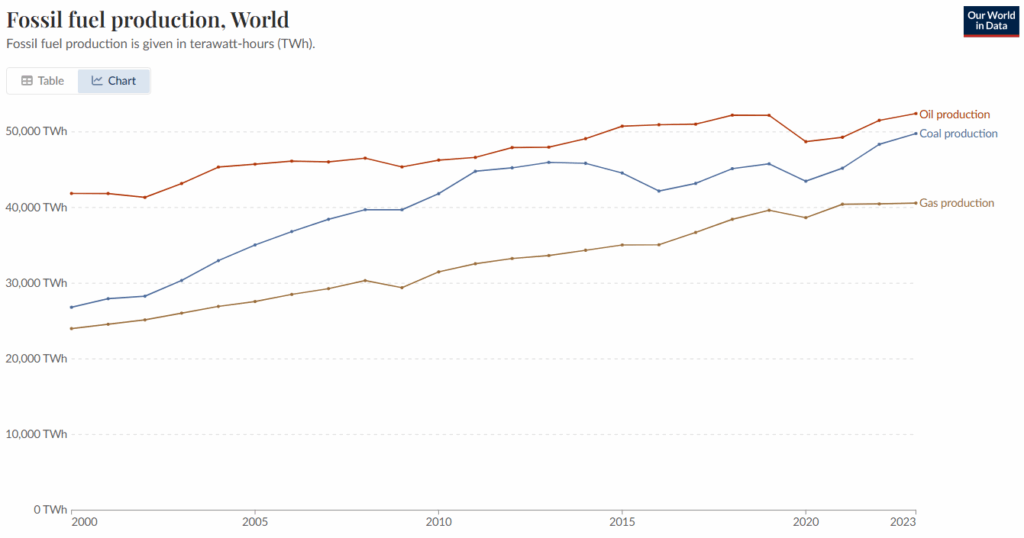
Source: Our World In Data
Data Table
| 2000 | 2010 | 2020 | 2023 | |
| Oil Production (TWh) | 41,863.73 | 46,271.11 | 48,708.86 | 52,432.23 |
| Coal Production (TWh) | 26,812.19 | 41,834.36 | 43,483.91 | 49,789.16 |
| Gas Production (TWh) | 24,007.17 | 31,501.74 | 38,661.79 | 40,592.31 |
Answer Key: Question 1: Natural gas showed the most consistent increase in production from 2000 to 2023. Answers will vary. (Example: This consistency might be because many countries are investing in natural gas due to it being a better alternative (with regard to emissions) to coal in power plants. It’s also used in heating and industry, which keeps demand stable.)
Question 2: Between 2000 and 2023, coal had the largest absolute increase (49,789.16 TWh – 26,812.19 TWh = 22,976.97), way above oil and gas. Answers will vary. (Example: Coal’s large increase may be due to industrial growth in developing countries that still rely heavily on coal for electricity. It’s often cheaper and more available than other fuels.)
Question 3: Answers will vary.
Question 4: Natural gas shows a smoother and steadier growth line than coal and oil, but it is also the least produced of all three. While coal and oil had some drops (especially around 2020), natural gas didn’t dip much. At the same time, all three are trending up (increasing) overall, with oil being the most produced, followed by coal, then natural gas.
Question 5: Answers will vary. (Example: To support growing gas production, a country would need to invest in drilling technology and equipment, pipelines to transport the gas, storage facilities, and export terminals like liquefied natural gas (LNG) ports. They would also need safety and regulation systems, as well as new power plants that use natural gas efficiently, and expansion of their grid.)
Exploring Natural Gas Lab
Introduction
Natural gas is a major energy source used to heat homes, generate electricity, and fuel vehicles. It is mostly composed of methane, a potent greenhouse gas. While combustion of natural gas generates less emissions than coal and oil, natural gas poses environmental challenges in its extraction and use. This lab utilizes the student activity station format to help students explore the science of natural gas from its formation to its combustion.
Student Objectives
Students will be able to
- Simulate and analyze methane production using biological processes, and explain how this relates to natural gas formation in landfills and biogas systems.
- Model and evaluate the process of hydraulic fracturing, identifying how permeability and rock layers influence extraction and potential environmental risks.
- Measure and compare temperature changes in water to evaluate relative heat transfer from different fuels in a combustion simulation.
- Construct a life cycle concept map of natural gas, illustrating key stages from formation to use, and identifying both environmental benefits and challenges at each stage.
Materials
- Student Handout (per student)
| Station 1 | Station 2 | Station 3 |
|---|---|---|
| – Packets of yeast (approx. 2 tsp per group) – Warm water (approx. 180 ml per group) -Sugar (approx. 1 tsp per group) – 2-3 lab flasks (16-20 oz) – Balloons (1 per group) – 2-3 funnels – 2-3 timers – Teaspoon or equivalent – 2-3 rulers or measuring tape | – 2-3 small clear containers – Clay (approx. 1 inch layer for each group) – Sand (approx. 1 inch layer for each group) – Sponge (approx. 1 inch layer for each group) – Colored water (approx. 20 ml per group) – 2-3 Syringes | – 3 small metal cans – Water (approx. 150 ml per group) – Natural gas burner – Large candle – Ethanol gel can – Thermometer – Tripod stand (to hold can safely above flame) – Beaker tongs – Lighter – Small beaker – Safety goggles – Heat-resistant gloves |
Teacher Set Up
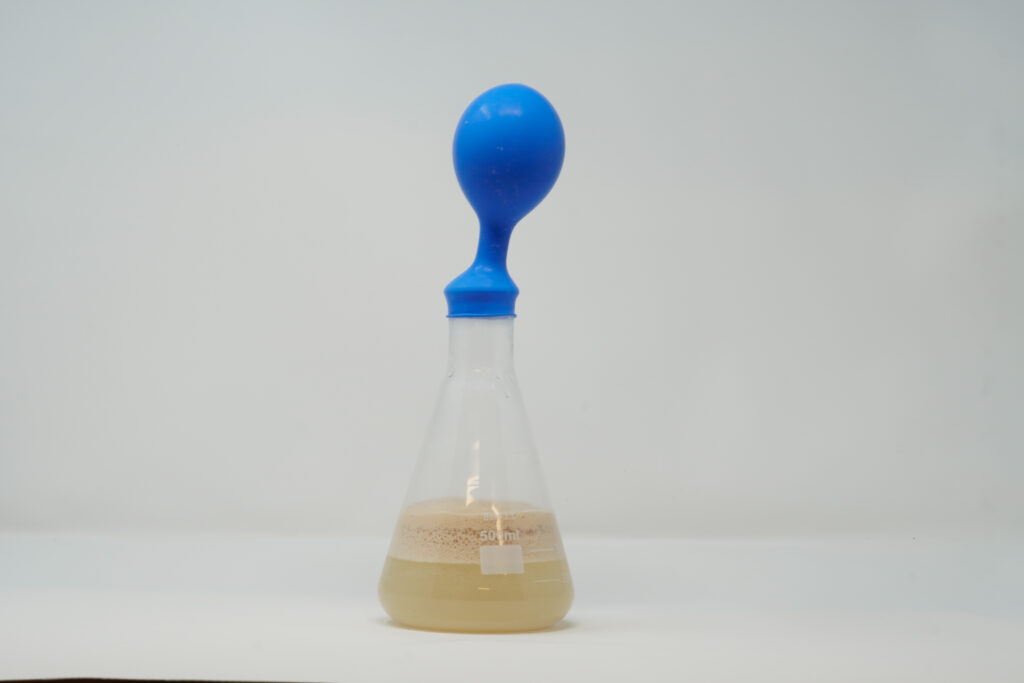
Station 1: Methane Formation and Capture Simulation
To set this station up, teachers will set up the sugar, teaspoon, yeast, and balloons on the side. Depending on the layout of the classroom, students can get warm water from classroom sinks (if available) or have a jug of warm water available on the table. Since funnels, lab flasks, rulers, and timers are reusable, just having 2-3 per station will be sufficient.
(Note: More than one group can be at this station at once, if space allows.)
Procedure
Included in Student Handout, along with a Data Table for recording observations/Analysis Questions.
- Add 1 tsp of sugar and 1 packet (or 2 tsp) of yeast to a flask.
- With the funnel, add warm water to fill one-third of the flask and swirl gently.
- Place a balloon tightly over the flask opening.
- Observe for 15 minutes, measuring the diameter with the ruler or measuring tape every 5 minutes, recording your measurements in the Data Table.
- Record any additional observations (color, smell, bubbles, etc.) on the Data Table.
- Tidy up the station area, rinse out the bottle, throw the balloon away, and return all materials to the proper place.
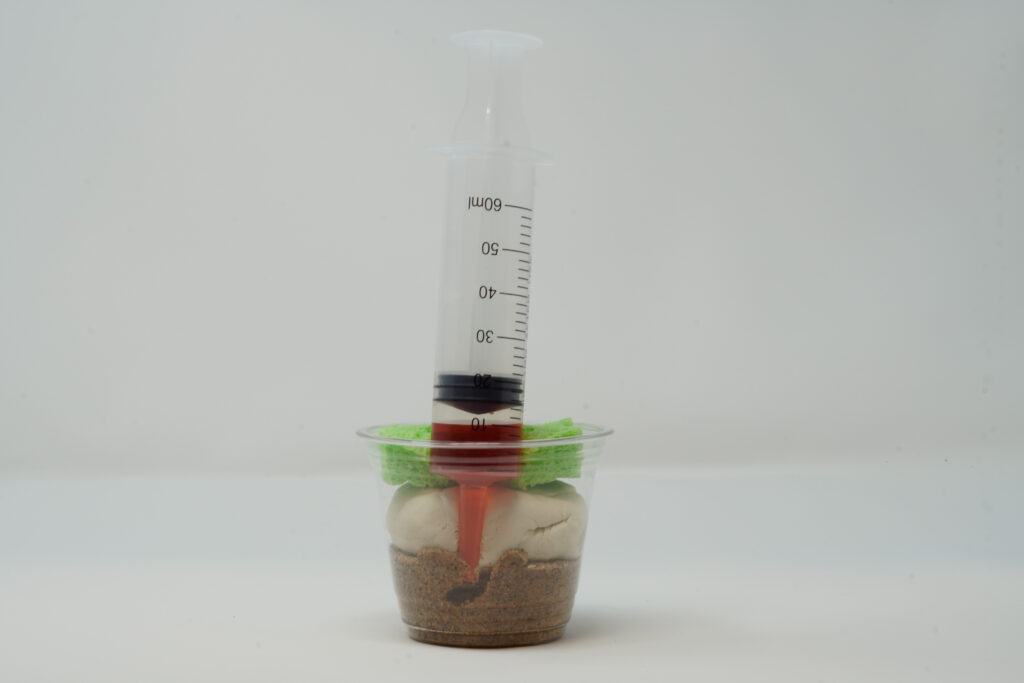
Station 2: Hydraulic Fracturing and Permeability Simulation
To set up this station, teachers will lay out the clay, sponges, and sand. Colored water can be prepared beforehand (food coloring and water) and made available for students in a jug. Since containers and syringes are reusable, 2-3 per station will be sufficient.
(Note: More than one group can be at this station at once, if space allows.)
Procedure
Included in Student Handout, along with a Data Table for recording observations/Analysis Questions.
- Create layers in your clear container. Start (at the bottom) with an approximately one inch layer of sand, representing the gas reservoir.
- Next, add an approximately one inch layer of clay, representing cap rock.
- Last, add an approximately one inch layer of sponge, representing porous rock.
- Fill the syringe with 20 mL of colored water.
- Inject the colored water into the bottom sand layer, by inserting the syringe along the side of the container.
- Observe how and where the fluid travels, and record your observations in the Data Table.
- Tidy up the station area, replace layers that are reusable and throw away those that are not (e.g. sand), rinse out the container, and return all materials to the proper place.
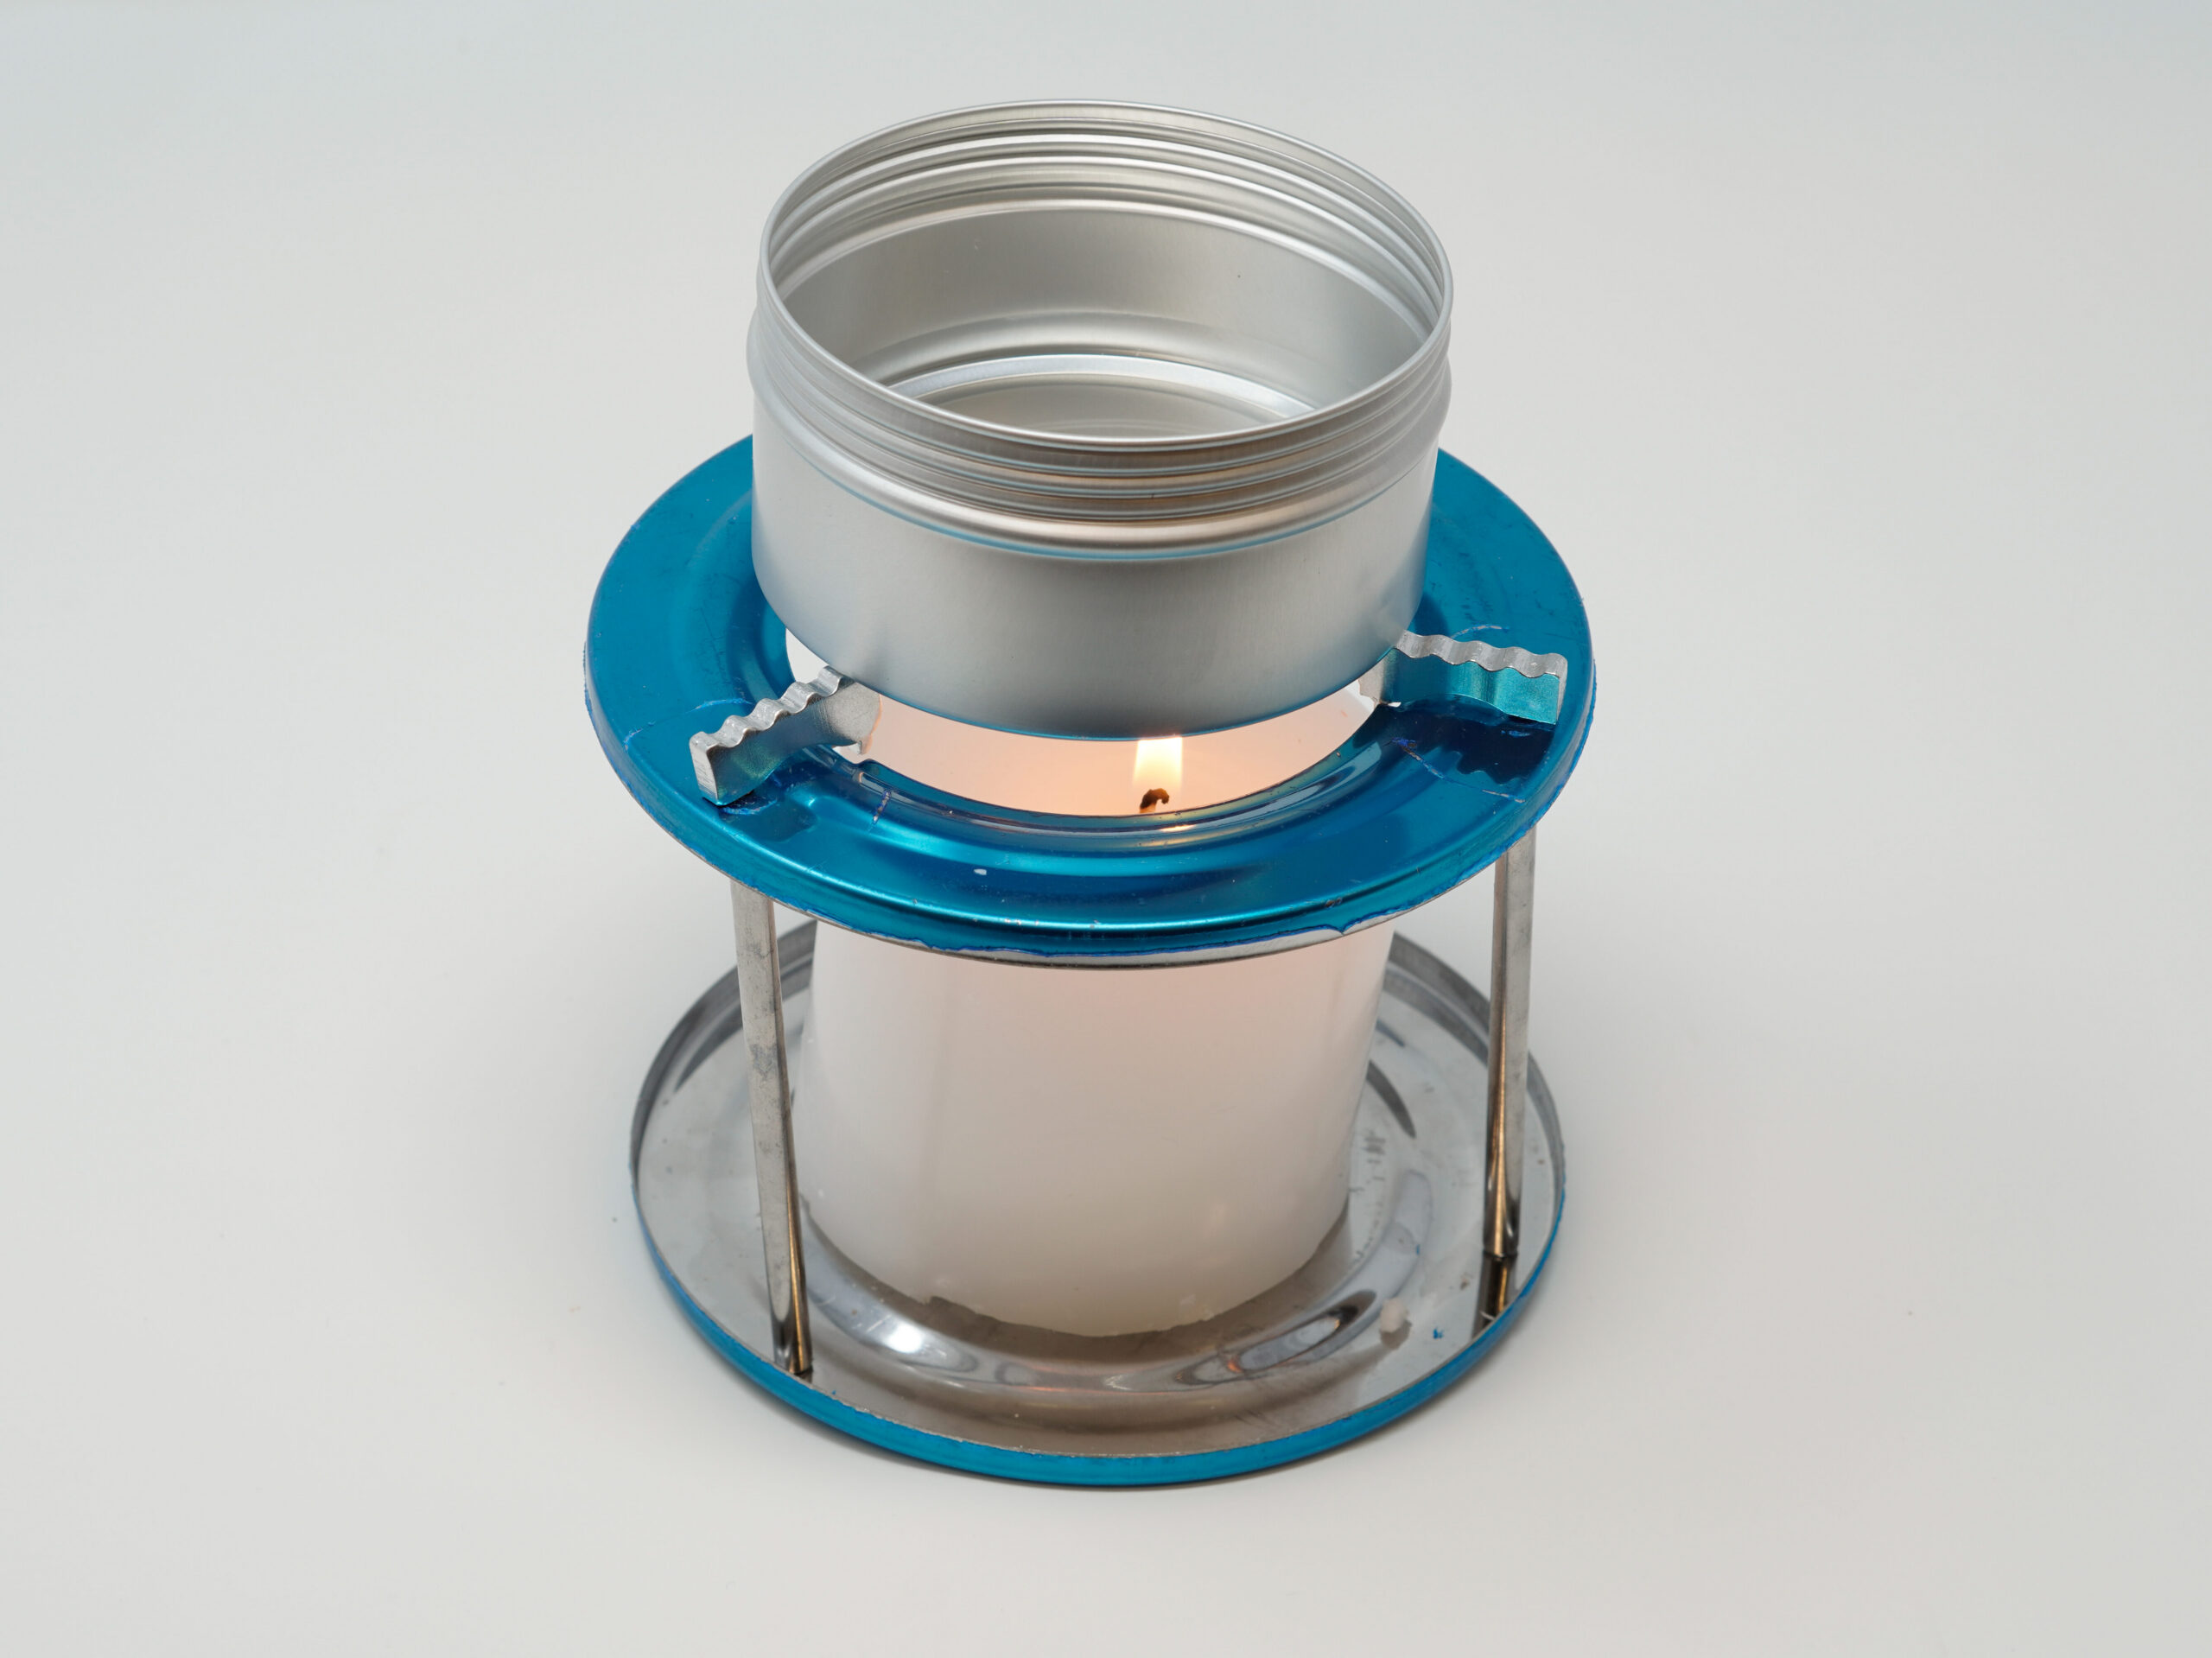
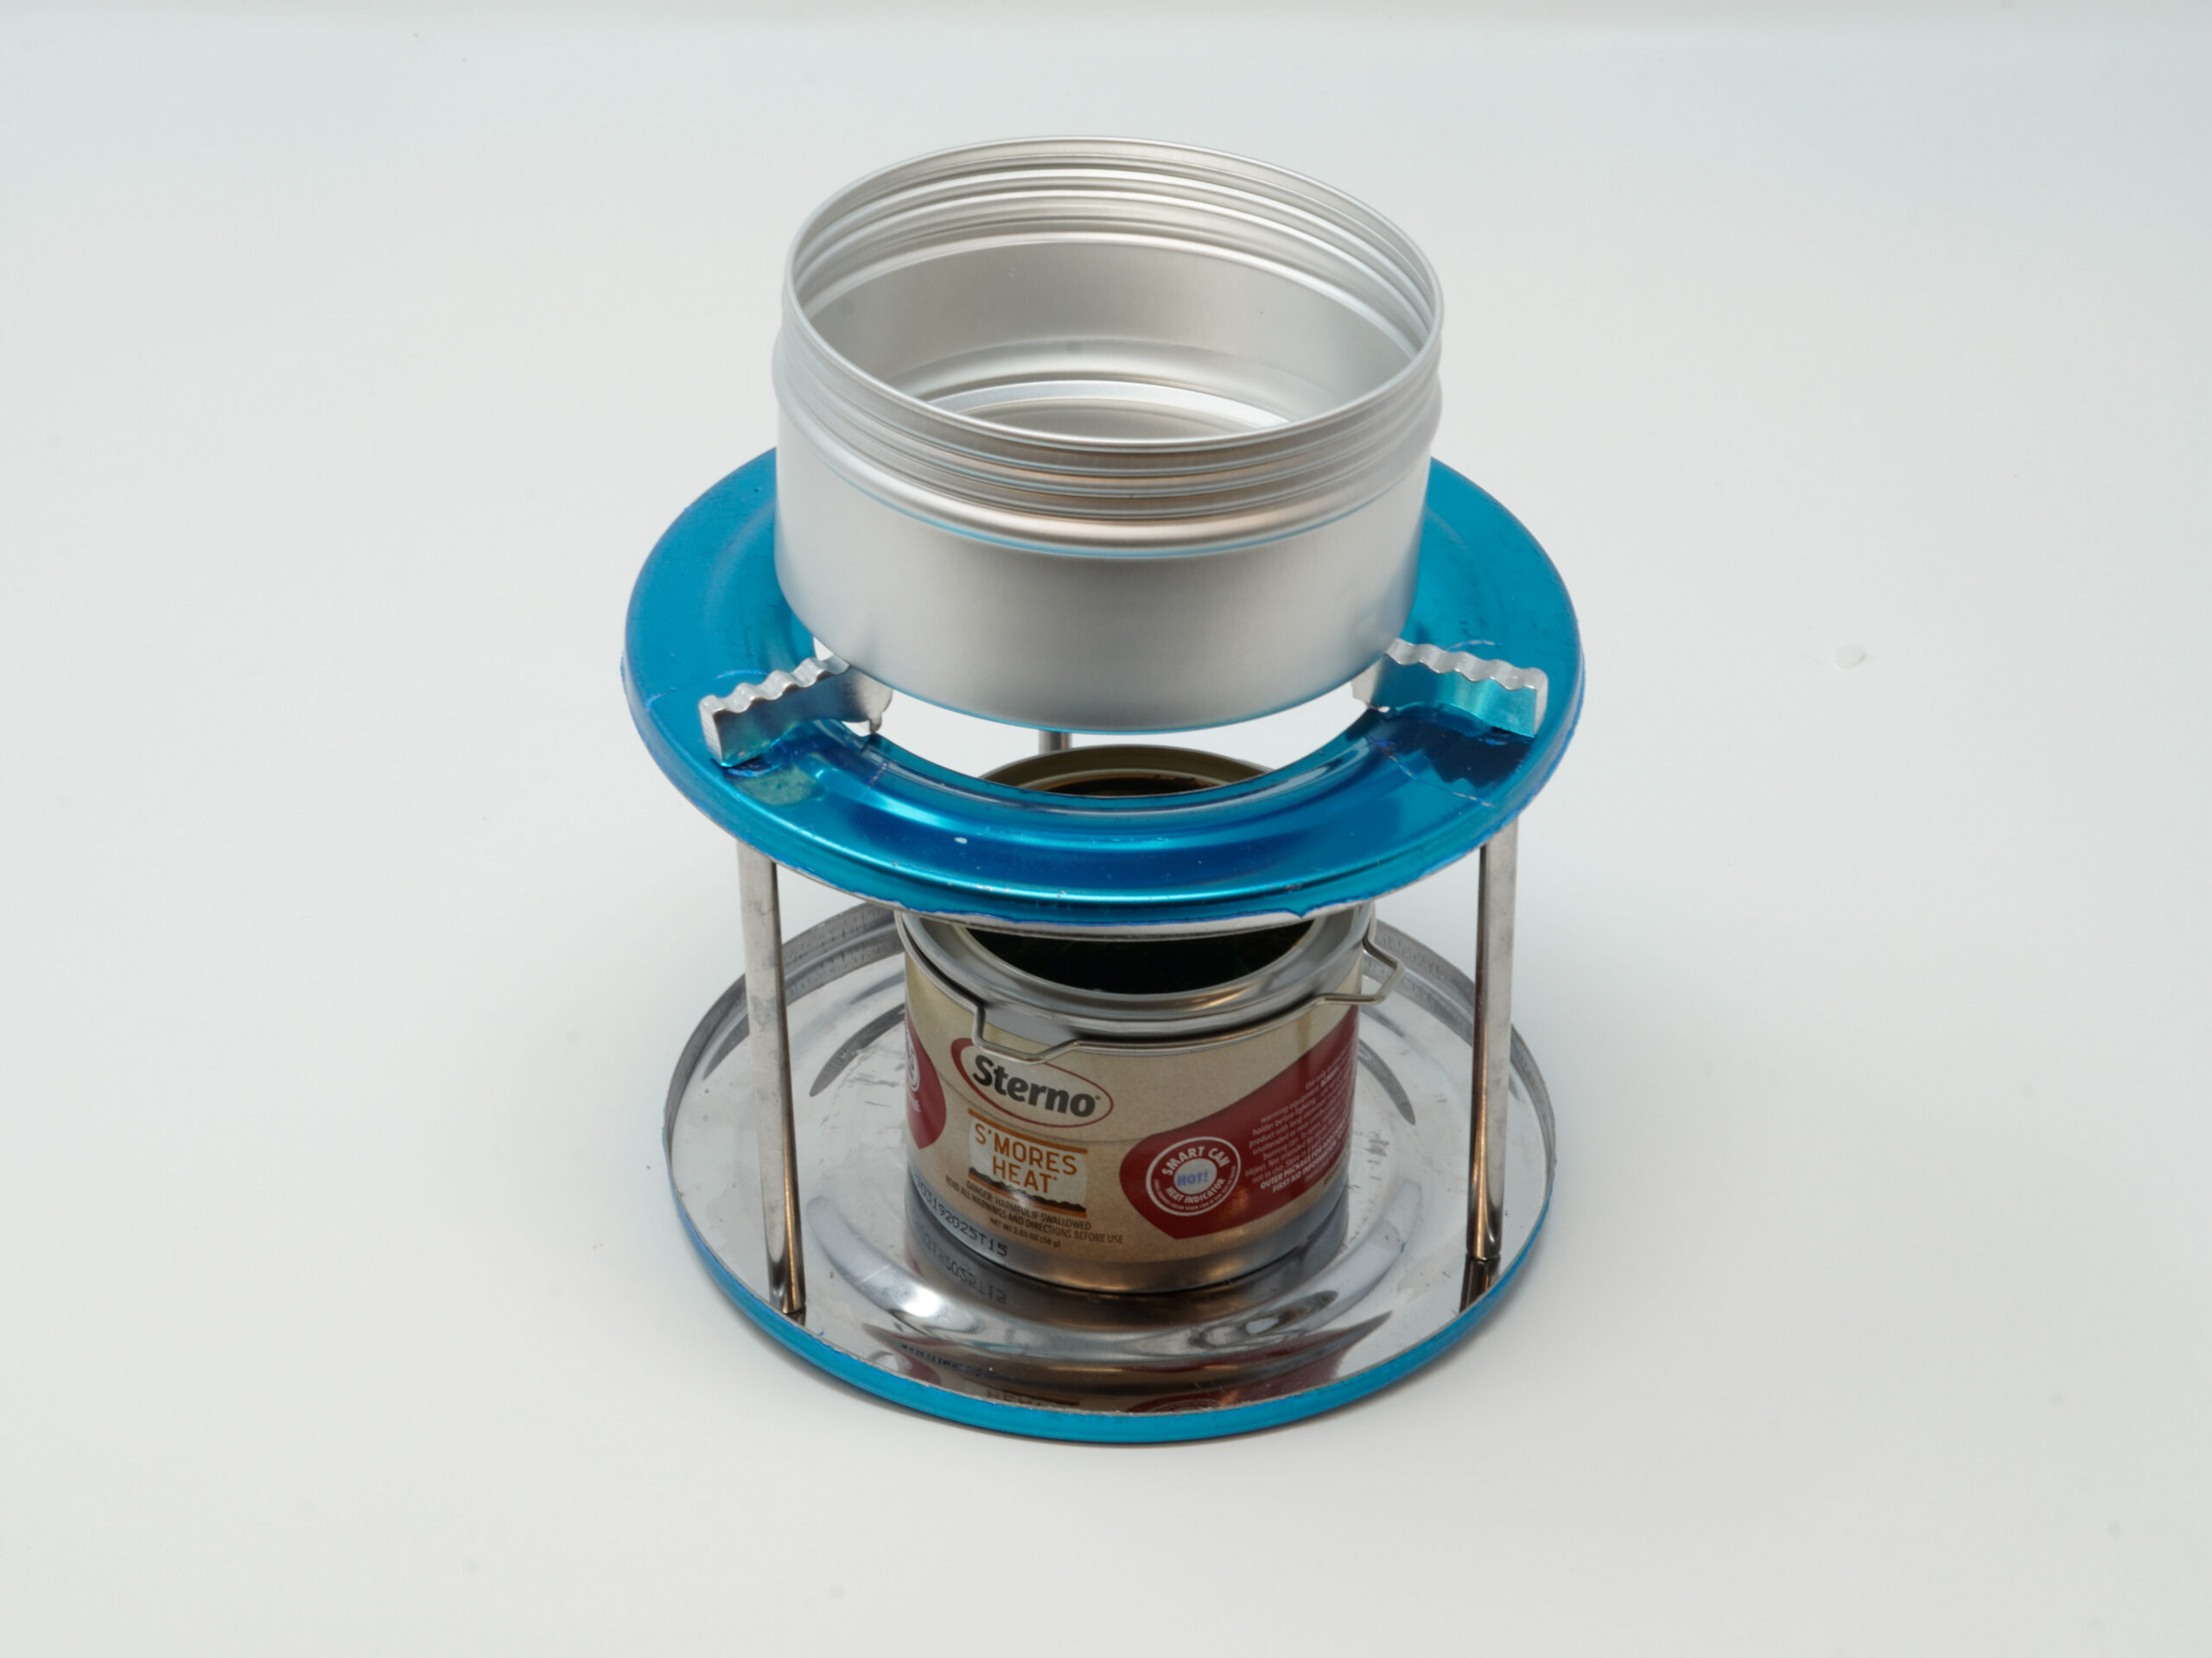
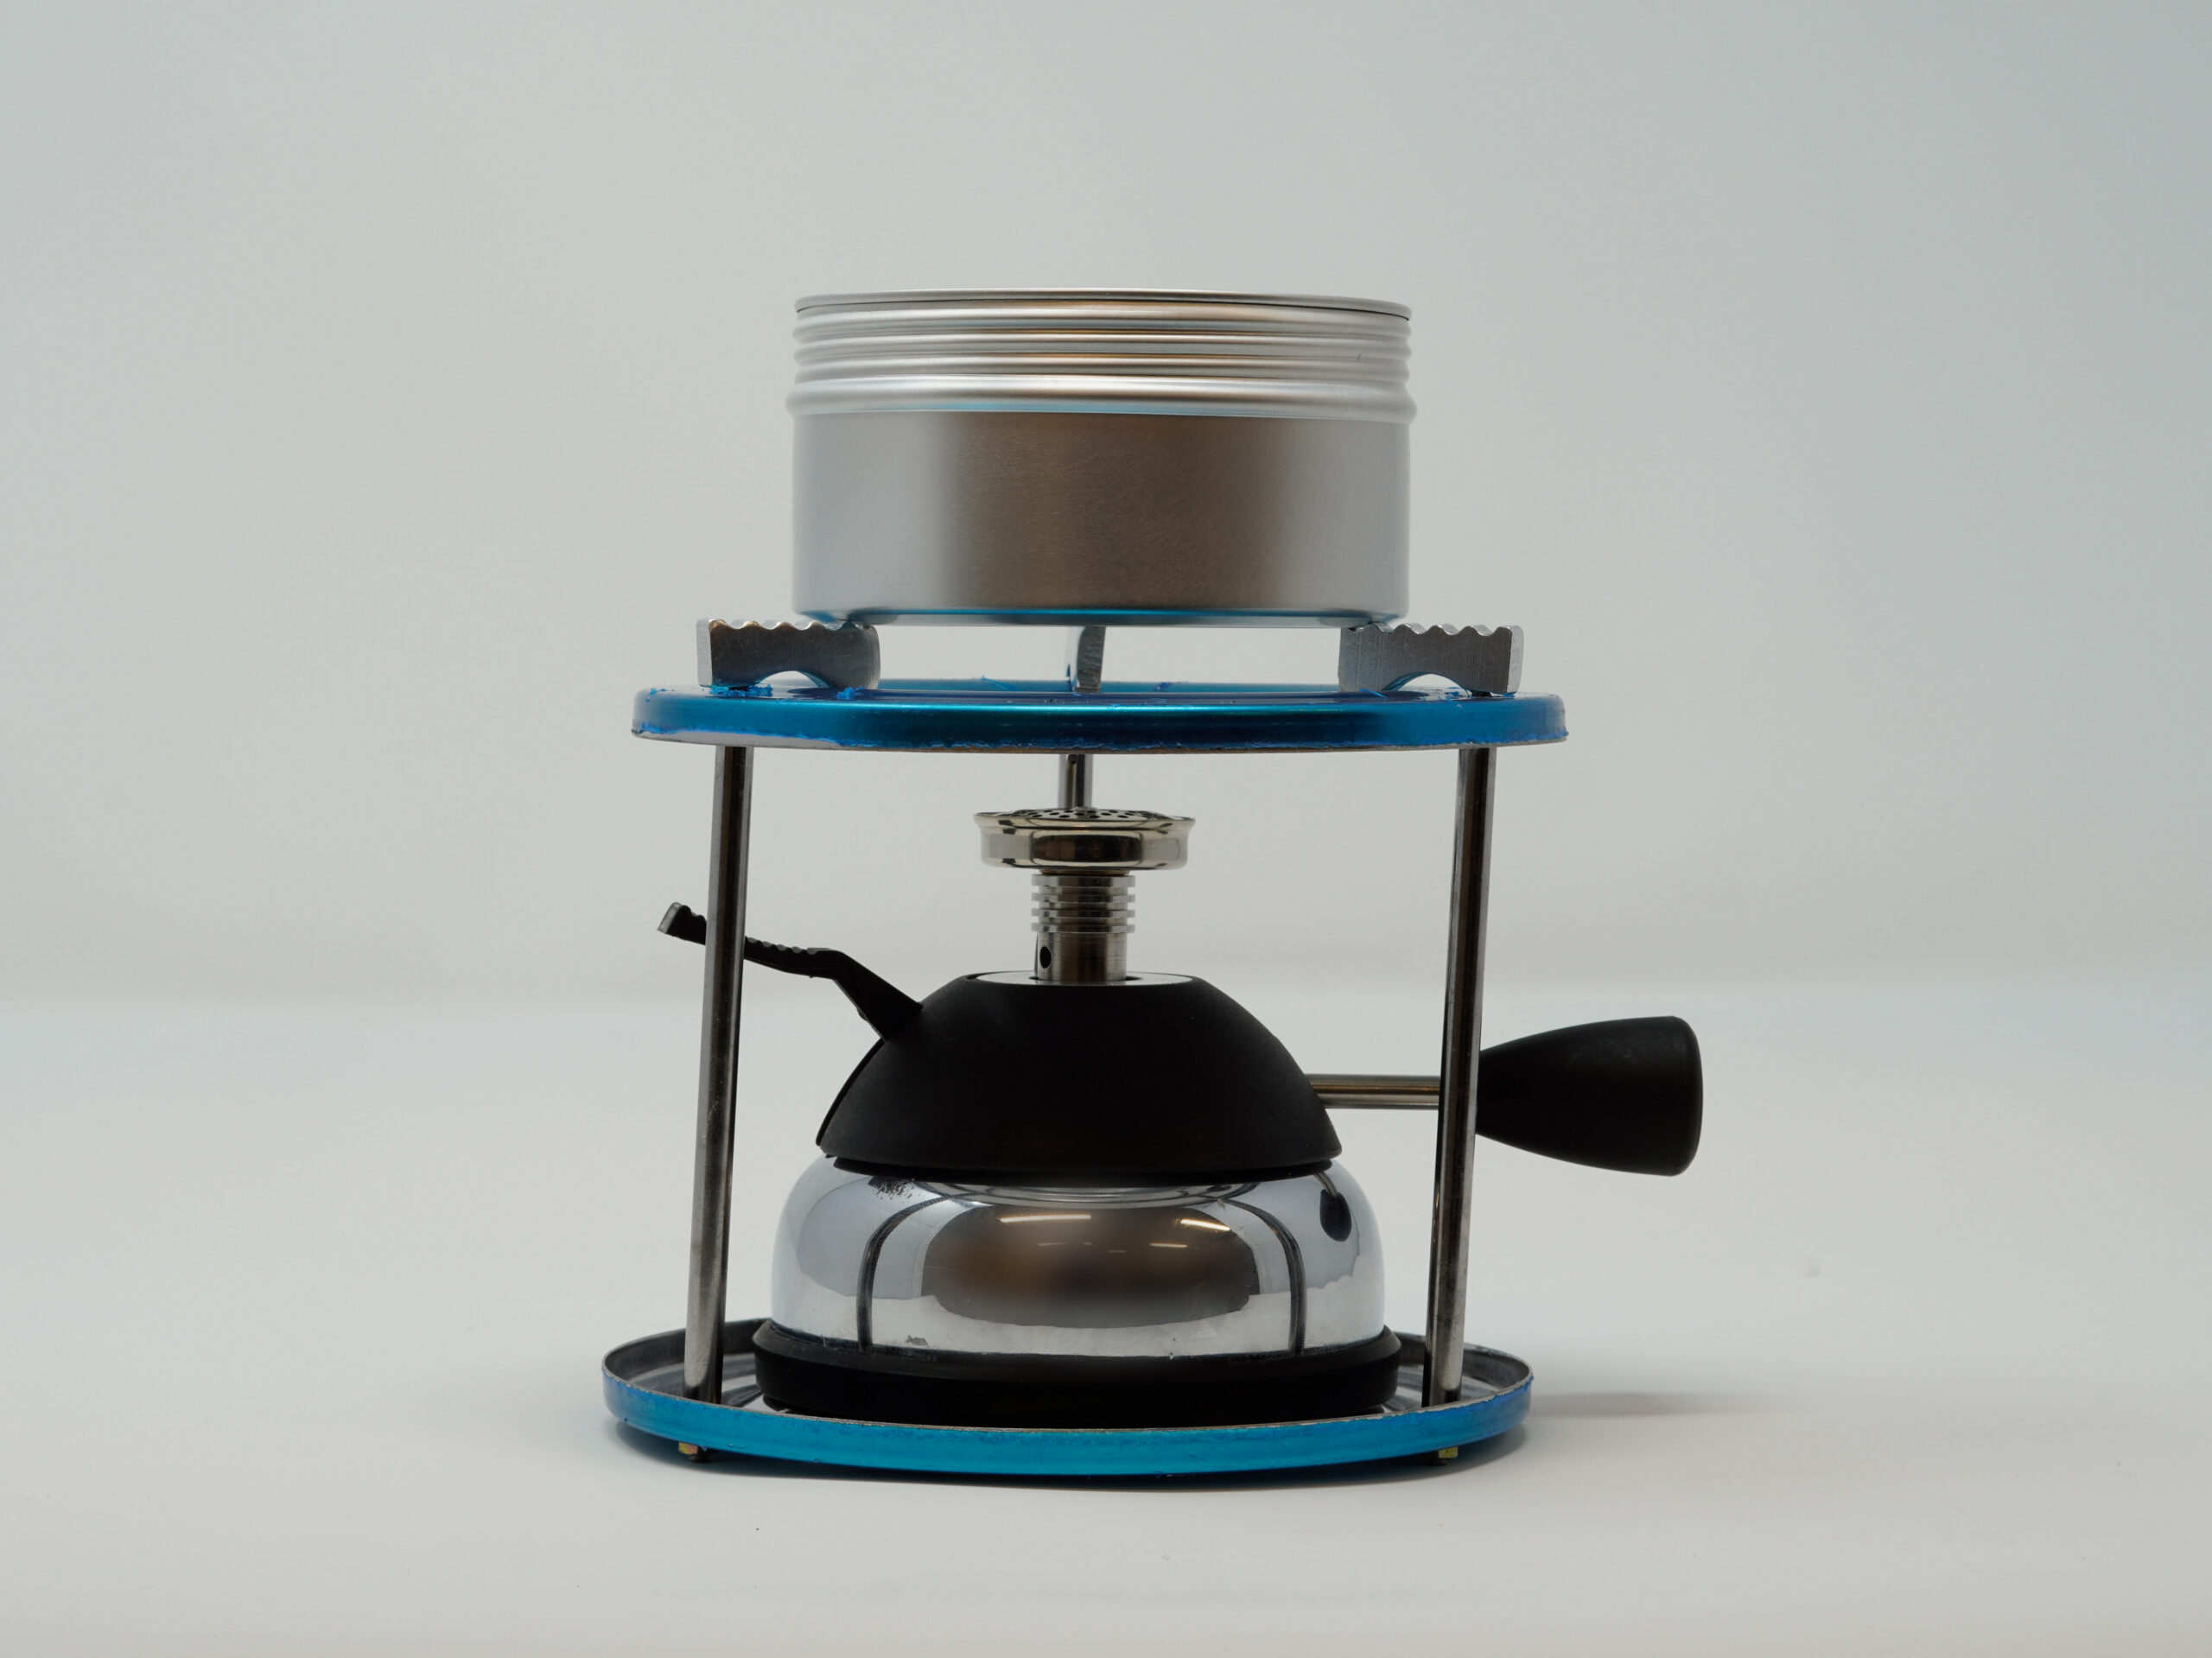
Station 3: Combustion Energy and Emissions Simulation
Since this station involves open flame and needs extremely careful monitoring, the teacher may decide to do this as a demonstration instead of setting it up as a student activity station.
Safety Reminder:
Only one group should conduct this experiment at a time due to the use of open flames and reactive substances. All students must wear safety goggles and use tongs or heat-resistant gloves when handling hot or chemical materials.
Instructor Lab Setup Instructions
Set up the materials in three distinct supply areas to organize the equipment efficiently:
Supply Area A – Heat Sources:
- Natural gas burner
- Large candle
- Lighter
- Ethanol gel can
Supply Area B – Safety Equipment:
- Safety goggles
- Heat-resistant gloves
- Tripod stand
- Beaker tongs
Supply Area C – Testing Materials:
- Three small cans
- Jug of water (if a nearby sink is unavailable)
- Thermometer
- Small beaker
Layout Recommendation:
Arrange the supply areas along a counter, bench, or side table in sequence (A → B → C), allowing for clear access and separation between categories. These areas are for instructor preparation and student access during guided portions, not part of the student rotation cycle.
Procedure
Included in Student Handout, along with a Data Table for recording observations/Analysis Questions.
- Prepare three identical metal cans, each containing 50 mL of water.
- Record the initial temperature using a thermometer and record that data on the Data Table.
- Set the tripod and candle in the middle of your work area.
- Place the can of water on the tripod above the candle. Make sure that the can is secure.
- Light the candle and immediately start a timer. Allow the water to heat for exactly 3 minutes.
- At the 3-minute mark, extinguish the flame. Measure temperature immediately after and record the final water temperature on the Data Table.
- Record any additional observations, such as soot, smell, smoke, etc.
- Let the metal can on the tripod cool for a minute. Then, using the beaker tongs, carefully remove the can and place it in a safe location where it can cool.
- Carefully remove the candle and replace it with the ethanol gel can.
- Place the second can of water on the tripod above the ethanol gel can.
- Light the ethanol gel can and repeat the procedure once again, filling out your data table.
- To extinguish the ethanol gel flame, use the beaker tongs to secure the lid over the can.
- Remove the ethanol gel can with the beaker tongs and place it in a safe location where it can cool.
- Place the natural gas burner beneath the tripod. Place the third can of water on the tripod.
- Turn on the natural gas burner, adjust to a consistent high flame setting, and repeat the 3-minute heating procedure.
- Tidy up the station area, empty and rinse containers (use beaker tongs to cool down metal cans with cold water, so it’s safe for the next group to use), and return all materials to their proper place.
Wrap-Up Activity
Included in the Student Handout, students will draw a concept map showing the lifecycle of natural gas.
Formation → Extraction → Combustion → Use → Environmental Impact
For each section, students will add a description, as well as notes concerning benefits and impacts at each stage, when applicable.
Answer Key
The Student Guide contains the Exploring Natural Gas Lab – Student Questions.
Station 1: Analysis Questions Answer Key
Question 1: The balloon inflates due to the production of carbon dioxide gas as it breaks down the sugar during anaerobic respiration (fermentation). The gas collects in the balloon, causing it to expand.
Question 2: This simulates microbial digestion in landfills or biodigesters, where microbes decompose organic waste and release gas like methane and carbon dioxide. Similarities include the microbial decomposition of organic material, and the production of gas that can be captured. Differences include that the yeast model mainly produces carbon dioxide, while real microbial digestion produces a mix of methane and carbon dioxide. Landfill microbes also work in low-oxygen environments, and take longer.
Station 2: Analysis Questions Answer Key
Question 1: The syringe injecting colored water represents high-pressure fluid being injected into rock layers. Similarities include the fracturing that forms in rock layers, and how the fluid moves through the porous material once fracture occurs. Differences include that real hydraulic fracturing uses extreme pressures and actual rock deep underground.
Question 2: Possible environmental risks include contamination if groundwater fluids leak through cracked layers, induced seismicity (small earthquakes), wastewater disposal and surface spills, and habitat disruption from drilling activity.
Station 3: Analysis Questions Answer Key
Question 1: Answers will vary.
Question 2: Answers will vary.
Wrap Up Activity (Example Responses) Answer Key
Formation: Organic material is buried and compressed over millions of years under heat and pressure, forming natural gas. One benefit is the formation of an abundant energy resource. One impact is that this energy source is non-renewable and could leak methane during extraction.
Extraction: Drilling and hydraulic fracturing release natural gas from underground reservoirs. Benefits include the high energy return and job creation. Impacts include groundwater contamination risk and habitat disruption.
Combustion: Natural gas is burned for heating, electricity, and transportation. Benefits include high efficiency and fewer particulates than coal or oil combustion. Impacts include carbon dioxide emissions.
Use: Energy produced with natural gas is used in power plants, homes, factories, and vehicles. One benefit of natural gas energy is that it has less emissions than other fossil fuels. One impact is the high cost of infrastructure investment.
Environmental Impact: Greenhouse gas emissions, along with risk of methane leaks, and water and land contamination. One benefit of natural gas is that it serves as a “bridge fuel” for transition between fossil fuels and lower emission energy sources. However, it still contributes to air pollution with carbon dioxide emission.
Conclusion Questions Answer Key
Question 1: High energy output, has fewer emissions than coal or oil, produces less soot and fewer particulates, is reliable and widely available, useful in many ways including heating, electricity production, and as a transportation fuel.
Question 2: Emits carbon dioxide when burned, risk of methane leaks (methane is a powerful greenhouse gas), risk of groundwater contamination from hydraulic fracturing, habitat and landscape disruption from extraction.
Question 3: Improved drilling techniques reduce leaks and spills; methane capture and leak detection technologies; research into carbon capture and storage; transitioning to lower emission energy sources; monitoring regulations to protect water and air quality.
Exit Ticket
Instructions: Access the Exit Ticket and have students reflect on and answer the prompt.