

Background Information: How Batteries Work
In batteries, electrolytes are substances like liquids or pastes that allow electrically charged particles, called ions, to move between the positive and negative terminals (the cathode and the anode). As ions move through the electrolyte, electrons flow through the external circuit, producing an electric current that can power a device.
A battery is made up of cells, and each cell contains:
- An anode – the electrode that releases electrons easily.
- A cathode – the electrode that accepts electrons easily.
- An electrolyte – the material that allows ions to move between the electrodes.
Two electrodes cannot be made of the same metal. Different metals hold onto their electrons with different strengths. Some metals, such as zinc, give up electrons more easily than others. Other metals, such as copper, hold onto their electrons more tightly and are more likely to accept electrons. The difference is what causes electrons to flow through the circuit.
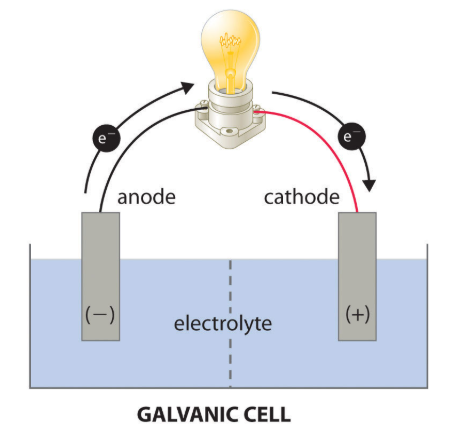
As zinc gives up electrons, it becomes the negative electrode (the anode). At the copper electrode, positively charged hydrogen ions in the electrolyte gain those electrons. This makes the copper electrode the positive electrode (the cathode).
When the anode and cathode are connected by a wire, electrons flow from th e anode to the cathode, producing an electric current.
Source: Freddy (https://chemistry.stackexchange.com
/users/5456/freddy), Positive or Negative Anode/Cathode in Electrolytic/Galvanic Cell, URL (version: 2017-01-22): https://chemistry.stackexchange.com/q/16789
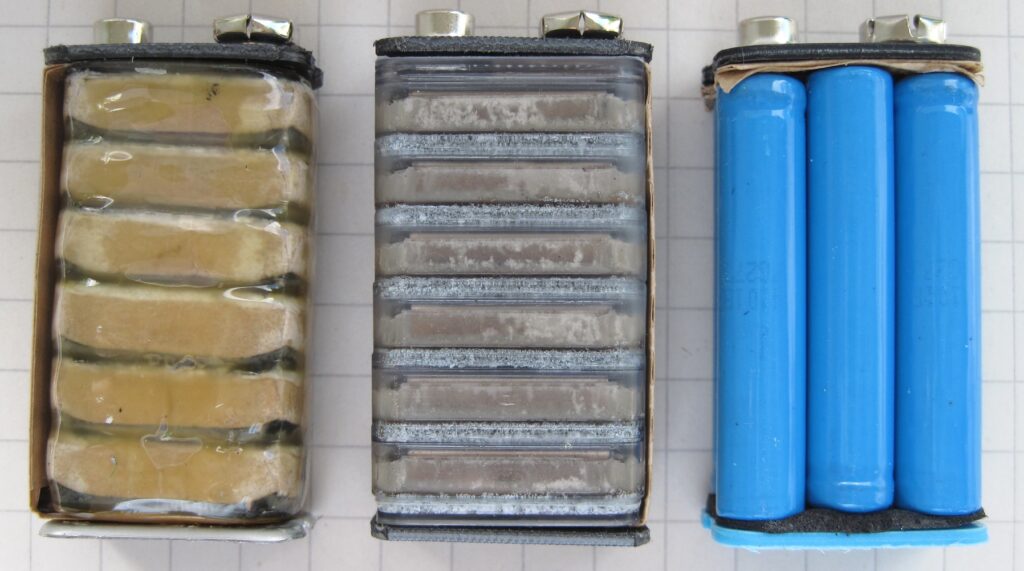
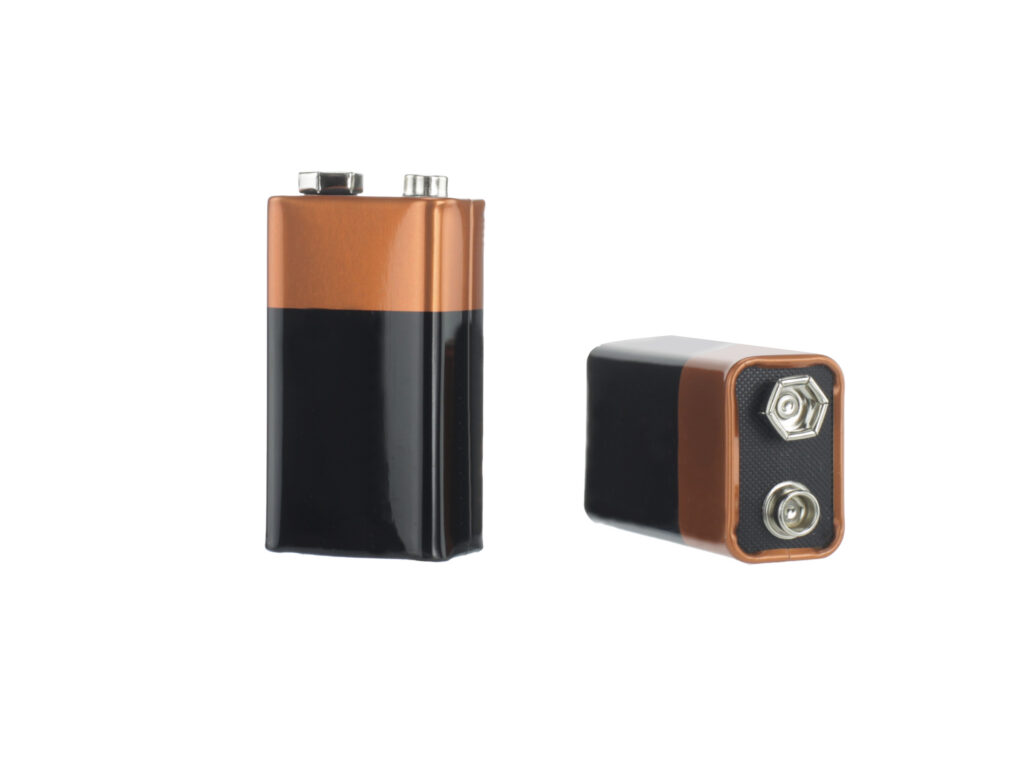
A 9V battery, despite its rectangular shape, is actually composed of six smaller 1.5V cells connected in series. Source: 9V innards 3 different cells.jpg by Lead holder is licensed under CC BY-SA 3.0 via Wikimedia Commons.

Why can’t one cell just make 9 volts? The voltage of a single cell is set by the chemistry of the electrodes, not by how much electrolyte you add. Each pair of materials (like zinc and copper) has a fixed potential difference. This is the amount of “push” it can give to moving electrons through a circuit. This depends on how easily one metal gives up electrons and other gains them. The electrolyte helps ions move and allows current to flow, but it does not increase the voltage of a single cell.
That’s why a 9V battery is made of multiple smaller cells connected in series. You can think of each cell as adding one small “push.” More cells add more total push (voltage). In the following experiment, changing the electrolyte may help the charge move more easily, but the electrodes determine the voltage of each cell. To get enough voltage to light the LED diode, you will likely need to connect multiple cells together.
Introduction
In this investigation, you will build your own battery, measure its voltage, and investigate which electrolyte can light an LED using the fewest battery cells.
Part 1: Build a Battery with Cola
Safety Guidelines
- Wear safety goggles.
- Never taste electrolyte solutions.
- Handle metal strips carefully.
- Handle electrolyte solutions carefully and avoid spills.
- Wash hands after the lab.
Instructions: Use the Data Tables below as you conduct the first experiment.
Data Table 1: Electrolyte Cola
| Voltage Trial 1 | Voltage Trial 2 | Voltage Trial 3 | Average Voltage | |
|---|---|---|---|---|
| One Cell: Control No electrolyte | ||||
| One Cell With electrolyte | ||||
| Two Cells With electrolyte | ||||
| Three Cells With electrolyte | ||||
| Four Cells With electrolyte |
Data Table 2: Electrolyte Cola
| Did the LED Diode Light Up? | Yes/No | Observations |
|---|---|---|
| 1 cell | ||
| 2 cells | ||
| 3 cells | ||
| 4 cells |
Procedure
One Cell: Set-Up
Step 1: Set out one zinc electrode and one copper electrode. Cover the middle of each with a piece of tape. The copper is the cathode (+) and the zinc is the anode (-).
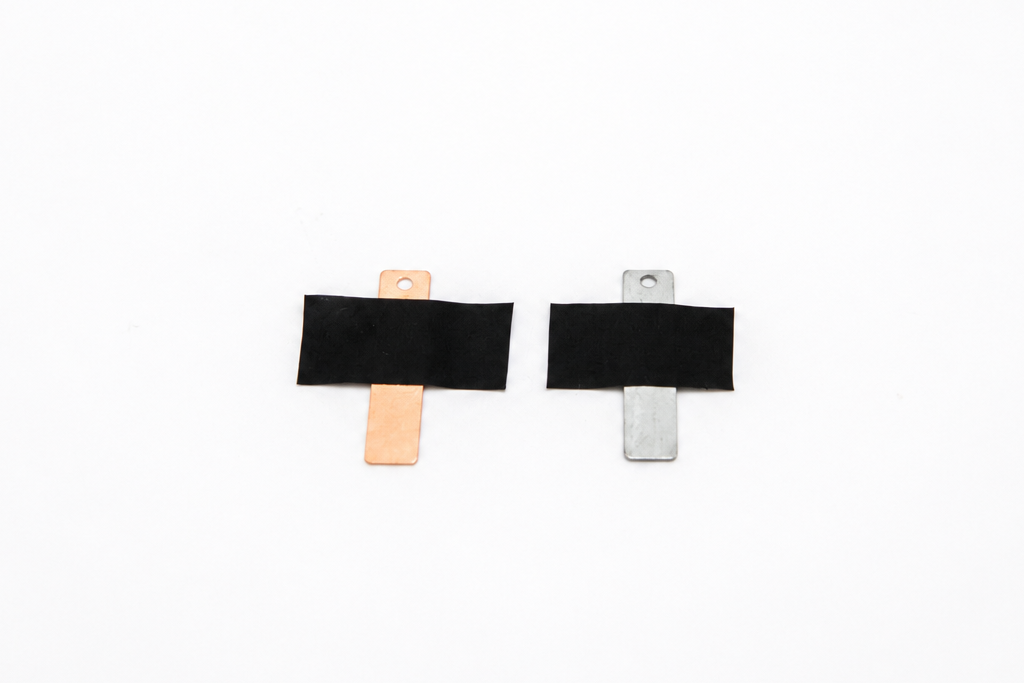
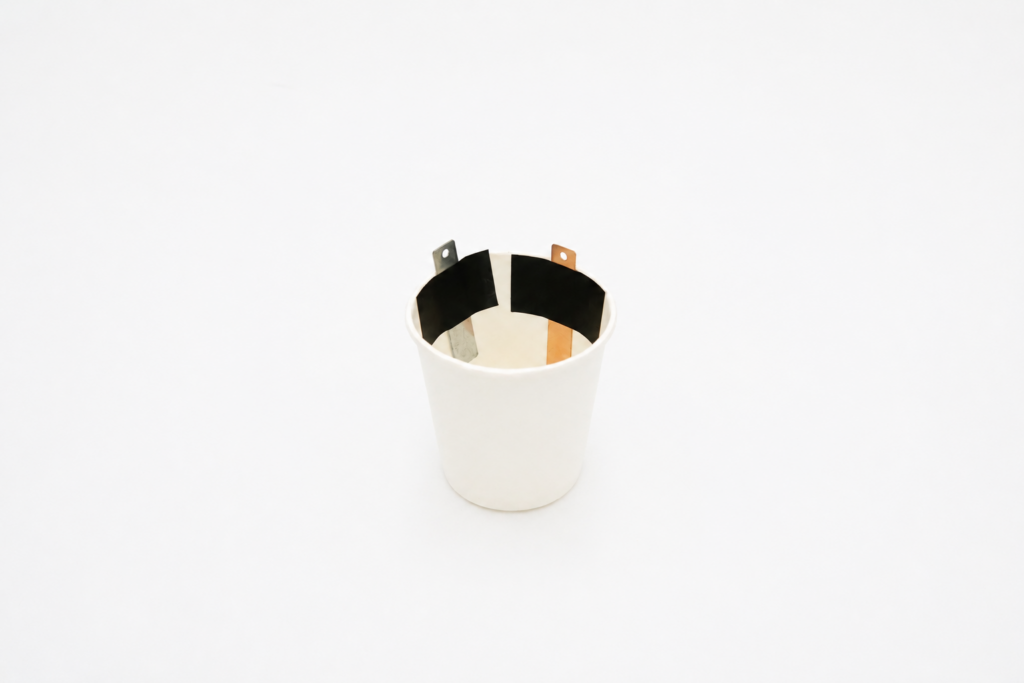
Step 2: Take one small cup, and tape one zinc electrode to one side (inside the cup) and one copper electrode on the opposite side. Make sure the electrodes do not touch.
One Cell: Testing Voltage (Control)
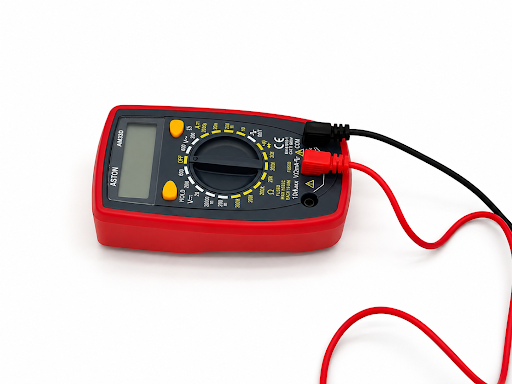
Step 1: Set up the multimeter. Plug the black probe into the COM port and the red probe into the Voltage (V) port.
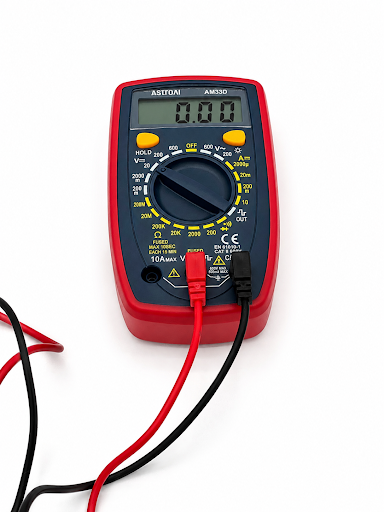
Step 2: Turn the dial to measure DC Voltage (20V range).
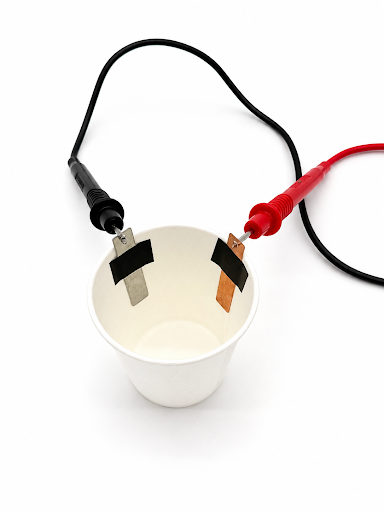
Step 3: Touch (or tape) the black probe to the zinc electrode and the red probe to the copper electrode at the same time.
Step 4: Read and record the voltage displayed on the multimeter in the Control row and Voltage Trial 1 column of Data Table 1 below.
Step 5: Disconnect and reconnect the probes for the 2nd trial, and then do a 3rd trial. Record your results in Data Table 1. Calculate the average voltage of the three trials.
Step 6: Disconnect the multimeter probes from the electrodes and set the multimeter aside.
One Cell: Testing Voltage with Electrolyte
Step 1: Measure 70mL of cola in the beaker and pour it into the cup. Make sure that part of the zinc and copper electrodes are submerged in the liquid. This is one cell.

Step 2: Once again, use the multimeter to measure the voltage of the one cell, this time with the electrolyte. Record the results in the 1 cell row and Voltage Trial 1 column of Data Table 1.
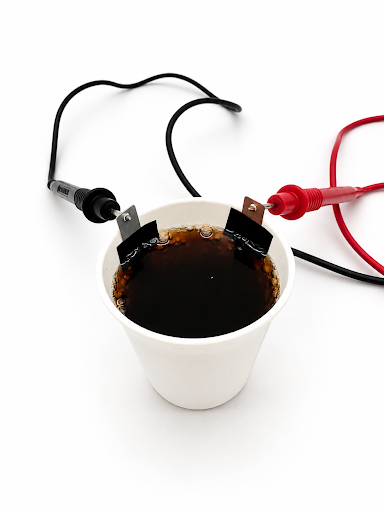
Step 3: Disconnect and reconnect the probes for the 2nd trial, and then do a 3rd trial. Record your results in the 1 Cell row of Data Table 1. Calculate the average voltage of the three trials.
Step 4: Disconnect the probes and set the multimeter aside.
One Cell: Testing LED Diode
Note: Look at the LED diode and notice that one lead is shorter than the other. This is important for the next step.
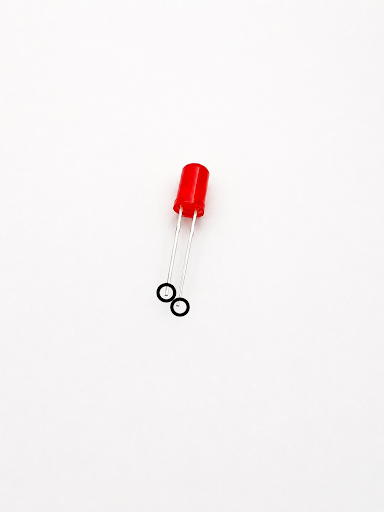
Step 1: Using a pair of alligator clips, connect the top of the zinc electrode to the short lead of the LED diode. Any color of alligator clips will work!
Step 2: With another pair of alligator clips, connect the top of the copper electrode to the long lead of the LED diode.
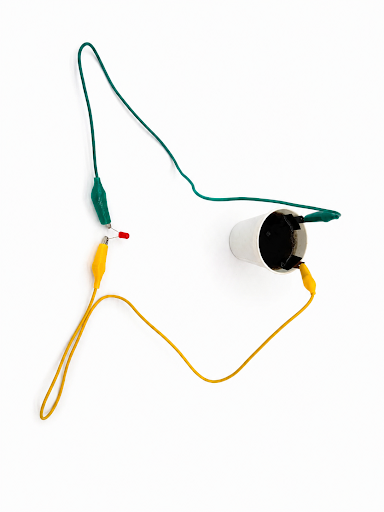
Step 3: Does the LED diode light up? Important: Each electrode must be connected to the right lead of the LED diode, in order for the diode to light up. Read steps 10-11 again, and ensure you followed directions exactly. Record your answer and observations in the 1 cell row of Data Table 2.
Step 4: If the LED diode does not light up, check that the leads are connected correctly. If the leads are correct, you may not have enough voltage, and may need to make another cell. To do this, first remove the LED diode and alligator clips from the cell.
Two Cells: Testing Voltage with Electrolyte
Step 1: Set up a second cup, with zinc and copper electrodes taped inside.
Step 2: Measure out and add 70mL of cola into the second cup.
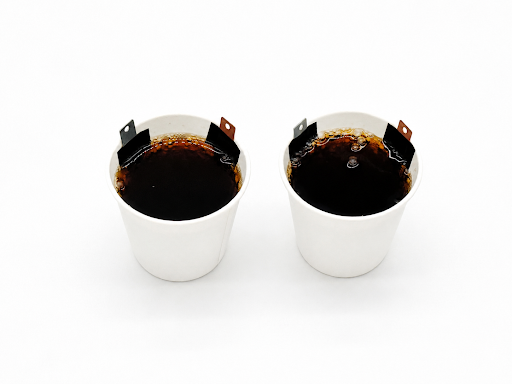
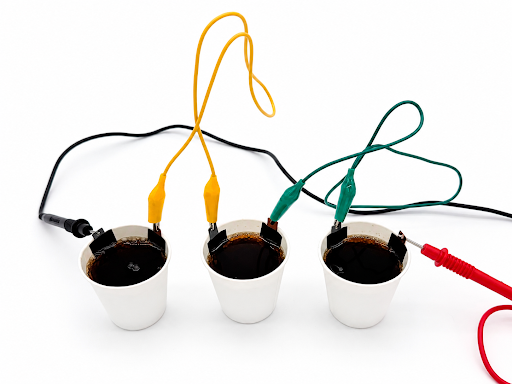
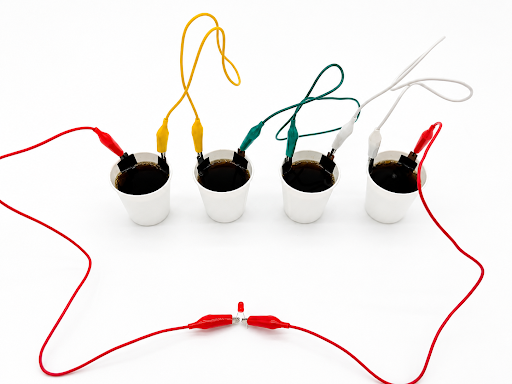
Step 3: Connect the cells in series. Using a pair of alligator clips, connect the copper electrode of the first cell to the zinc electrode of the second cell.
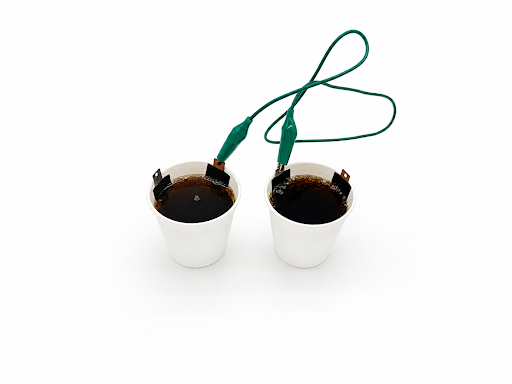
Step 4: Using the multimeter, measure the total voltage of the two-cell system by touching the black probe to the zinc electrode of the first cell, and the red probe to the copper electrode of the second cell. Record the voltage reading in the 2 cells row and Voltage Trial 1 column of Data Table 1.
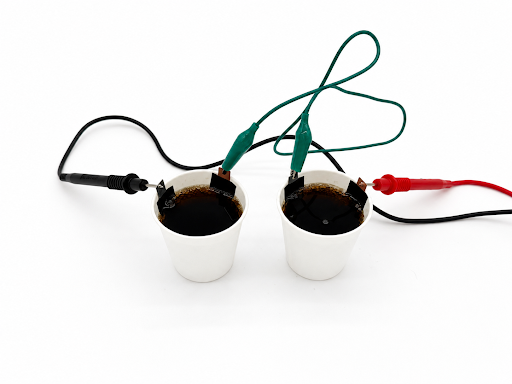
Step 5. Conduct two more trials of the voltage reading, then calculate the average voltage of the three trials.
Step 6: Disconnect the multimeter probes from the electrodes and set the multimeter aside.
Two Cells: Testing LED Diode
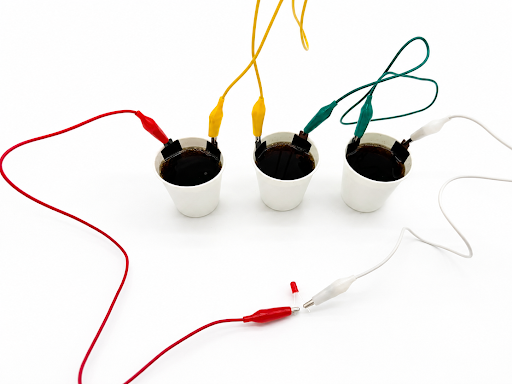
Step 1: Connect the LED diode to the open ends of the two-cell system using two pairs of alligator clips. Connect the zinc electrode of the first cell to the short lead of the LED diode.
Step 2: Connect the copper electrode of the second cell to the long lead of the LED diode.
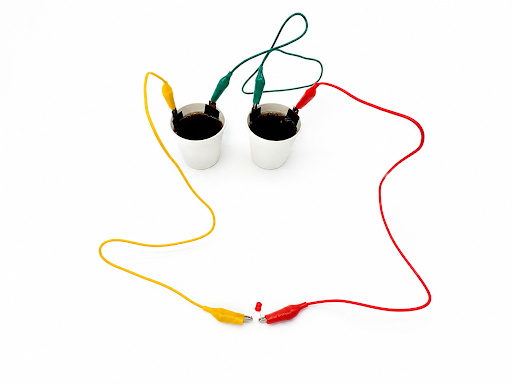
Step 3: Does the LED diode light up? Record your observations in the 2 cells row of Data Table 2.
Three Cells: Testing Voltage with Electrolyte
Step 1: If the LED diode doesn’t light up, build a third cell with electrodes and electrolyte. Connect the three cells in series.
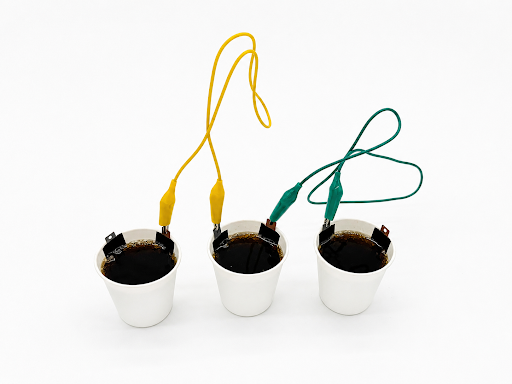
Step 2: Using the multimeter, conduct three trials to record the voltage of the three-cell series in the 3 cells row of Data Table 1. Calculate the average voltage of the three trials. Then set the multimeter aside.
Three Cells: Testing LED Diode
Step 1: Carefully connect the LED diode and see if it lights up. Adding more cells increases the total voltage of your battery. Record your observations in the 3 cells row of Data Table 2.
Four Cells: Testing Voltage and LED Diode
Step 1: Finally, build a fourth cell. Just like before, record voltage readings, and then test the diode again, recording your final observations in Data Table 1 and Data Table 2.
Clean Up and Prepare for the Next Experiment
- Disconnect the alligator clips from the electrodes.
- Carefully dispose of the remaining cola from the cups in the sink or waste container as directed by your teacher.
- Remove the tape and collect the zinc and copper electrodes.
- Wipe the electrodes thoroughly with a damp paper towel to remove any cola residue.
- Dry the electrodes with a clean paper towel.
- Rinse the cups thoroughly and dry them with a paper towel.
Part 2: Conduct a Controlled Experiment
Your group will receive or choose a different electrolyte to test, such as vinegar, salt water, or an energy drink.
The only variable you should change is the electrolyte solution. Keep all other parts of the investigation the same. These are your controlled variables, and they help ensure that any differences in battery performance are caused by the electrolyte.
Each group in the class will choose an electrolyte to test from materials provided by the teacher. At the end of the investigation, your class will combine everyone’s result into a single data set to compare battery performance across all of the electrolytes.
Prediction
Question: Which electrolyte do you think will require the fewest battery cells to light an LED?
Discuss your ideas with your group, then write a hypothesis.
Hypothesis:
I think _____________________________________________ will require the fewest battery cells to light an LED because ________________________________________________________________________________________________.
Identify the Variables
| Independent Variable: |
| Dependent Variable: |
| Controlled Variables: |
Follow the same steps as Part 1, with your new electrolyte, and record your data in the data tables below.
Data Table 1: Electrolyte _______________________
| Voltage Trial 1 | Voltage Trial 2 | Voltage Trial 3 | Average Voltage | |
|---|---|---|---|---|
| Control | ||||
| 1 cell | ||||
| 2 cells | ||||
| 3 cells | ||||
| 4 cells |
Data Table 2: Electrolyte _______________________
| Did the LED Diode Light Up? | Yes/No | Observations |
|---|---|---|
| 1 cell | ||
| 2 cells | ||
| 3 cells | ||
| 4 cells |
Data Table 3: Class Data
You will complete this table after all groups share their results.
| Electrolyte Substance | Average Number of Cells Needed to Light the LED Diode |
|---|---|
Post-Lab Analysis
- With your chosen electrolyte solution, how many cells did your group need to light he LED diode?
- Was your group’s prediction correct? Explain why or why not.
- What trends in voltage did you see as more cells were added to the set-up? What does this show about how cells work in series?
- Why do you think some electrolytes require more cells to light the LED diode than others?
- How did your chosen electrolyte perform compared to the other electrolytes that were tested by the class, in regards to the number of cells needed to light the LED diode?
Advanced Questions: Post-Lab Analysis
- In this lab, what mainly determines the voltage of a single cell: the electrode materials or the electrolyte?
- What job does the electrolyte do inside the battery?
- Why does adding more cells help light the LED diode?
- What is one source of error in your experiment that could have affected your results?
- What is one way you could modify or improve this experiment if you were to do it again?
- If you wanted to build a higher-voltage battery, what changes would you make to the materials or set-up?
Optional Extension Challenge
Modify one variable (such as electrode material or electrolyte concentration/amount) to see if you can reduce the number of cells needed to light the LED diode. Be sure to keep all other variables constant when testing your change.